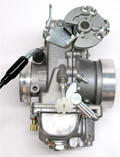
Be safe – no smoking or open flame. Don’t get gasoline on your skin. Wear eye protection.

(See available PDF for printable version)
Installation
- Remove side panels, seat and fuel tank
- Remove the screw that holds the rear brake reservoir. Hang the reservoir out of the way.
- Remove throttle cables from carburetor.
- Remove the stock choke cable
- Loosen carburetor clamps.
- Remove carburetor from right hand side of bike.
- Remove choke cable from TM40
- Install TM40 into the carburetor boots and tighten the clamps
- Re-install TM40 choke cable
- Bolt choke knob bracket to the top forward starter drive cover bolt.
- Tighten the nut that holds the choke knob to the bracket
- Attach the 'closing' (push) cable (02-0589) to the carburetor. It fits in the top position of the cable bracket. Use the 'slotted nut'. There should be one nut on each side of the bracket. The cable end goes in the second (furthest) hole on the pulley.
- Attach the 'opening' cable to the carburetor. It fits in the bottom position of the cable bracket. There should be one nut on each side of the bracket. The cable end goes in the second (furthest) hole on the pulley.
- Note - Cable orientation: The long cable nubbins and longer threaded adjusters go to the carb. Short nubbins and shorter adjusters go to the throttle.
- Route the cables through the triangular space in the frame above the motor and around the front of the top triple clamp.
- Remove the original cables from the throttle housing and replace them with the new throttle cables. The opening cable goes to
- the front and the closing cable goes to the rear. Make sure they work smoothly and do not bind in the housing.
- Adjust the cable free play. The opening cable should have a very small amount of free play. The closing cable should have a bit more than the opening cable does.
- Drill out the 2 rivets that hold the snorkel into the top of the air filter box and remove the snorkel.
- Reinstall the fuel tank and brake reservoir.
- Start the bike and adjust the idle speed with the white plastic knob on the left-hand side. Turn the handlebars fully left and right to make sure the cables do not bind or cause the engine to rev.
- Reinstall the seat and side panels.
- Test ride.
Tuning
Needle and jet changes can be done without removing the carburetor from the bike. Remove the tank, seat and side panels. Loosen the carburetor clamps and rotate the TM40 to the right.
Standard jetting as delivered:
Main Jet 150
Pilot Jet 22.5
Needle Clip 3rd position (from top)
These settings will work great for most XR650Ls with the snorkel removed from the airbox, an aftermarket air filter and
aftermarket muffler. Bikes with stock muffler will likely need a smaller main jet. We have included a selection of jets to accommodate a wide range of modifications, elevation and conditions. We have also included the Mikuni HS40/TM40 tuning manual.
Adjusting the idle mixture screw - With the motor fully warmed up (after 10-15 minutes of spirited riding) and the mixture screw 3 turns out from lightly seated. Turn the mixture screw inwards until the idle speed drops slightly. From that point turn the mixture screw outward 1/8 to 1/4 turn.
Needle position - Choose the (leanest) lowest needle (highest clip) position that allows the bike to smoothly hold a steady 45mph in 5th gear. If the bike surges or otherwise does not hold a steady speed easily and smoothly, raise the needle (lower the clip).
Main jet - To test the main jet selection, run the bike at wide open throttle in 4th gear on a level road. When the bike is pulling cleanly at a good high RPM & wide-open throttle slowly back off on the throttle to about 7/8 throttle. If the bike picks up speed or power as you slightly back off the throttle then you are too lean on the main jet. If the bike only slows down slightly then your main jet selection is close. If it is too rich the exhaust note may sound flat as the motor revs out. If it is significantly too rich it may misfire as the revs climb.