LED Turn Signal Isolator Installation
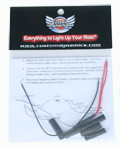
You have already gone ahead and installed LED turn signals and now you miss your dash indicator light. Tired of your buddies pulling up next to you on a ride and giving you the flasher hand signal to get you to turn your blinker off. Yeah, I got tired of that too, so I installed our 'LED Turn Signal Isolator' Kit. This puts a little diode in the system so that you can actually see your indicator light work when your blinkers are on, in BOTH directions.
- Begin by removing the headlight cowl and unwrapping the protective wrap around the mass of wires above the headlight.
- Trace the wires from the indicator dash (see image below and click on it for a larger version) to where they plug into the main harness with a blue six-wire connector.
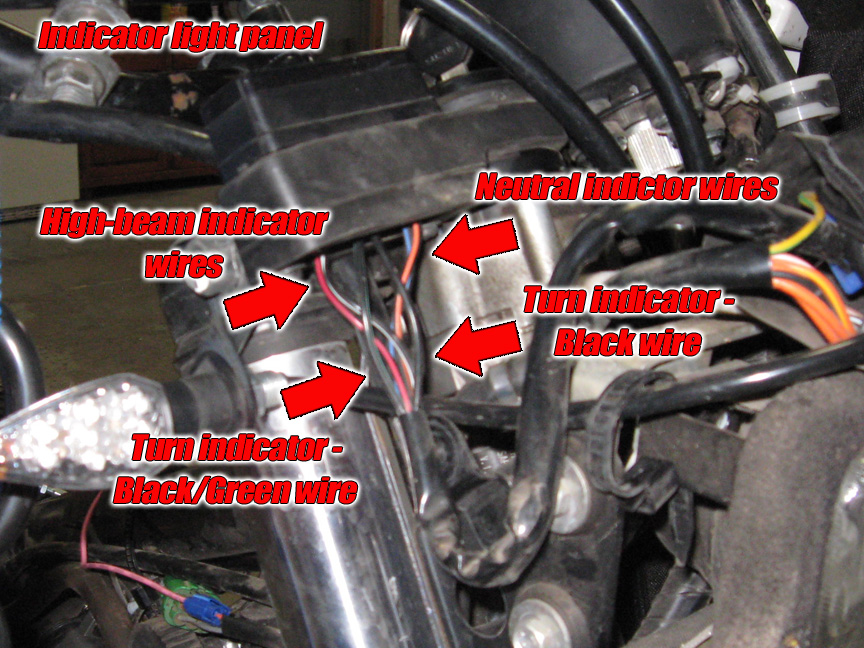
- The wires coming out of the turn indicator on my 2009 model were Black and then a Black with a Green stripe. Verify this on your motorcycle before proceeding by gently pulling the little indicator light out of the dash and looking at the two wires. It is VERY important that you are SURE which are the correct wires as you are going to cut them in a few moments!
- Slide the plastic tubing up over the wires towards the lights (away from the connector) as far as possible.
- You can cut these two wires wherever you like. I decided to do it near the connector. After pushing the tubing up, I left about half an inch and then snipped the two wires.
- Now strip both sides of the new cuts about a quarter of an inch from the ends.
- Solder one Red wire from the kit to the Black wire coming out of the connector, then solder the other Red wire to the Black/Green wire out of the connector.
- Solder the White wire from the kit to the Black/Green wire coming from the indicator bulb.
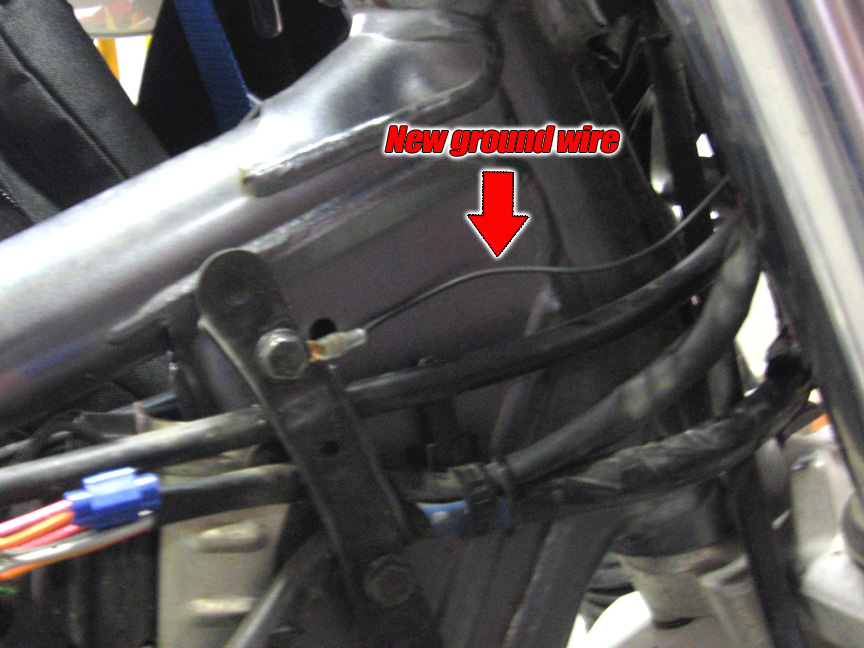
- Solder the Black extension wire onto the Black wire coming from the indicator bulb and take to a frame ground.
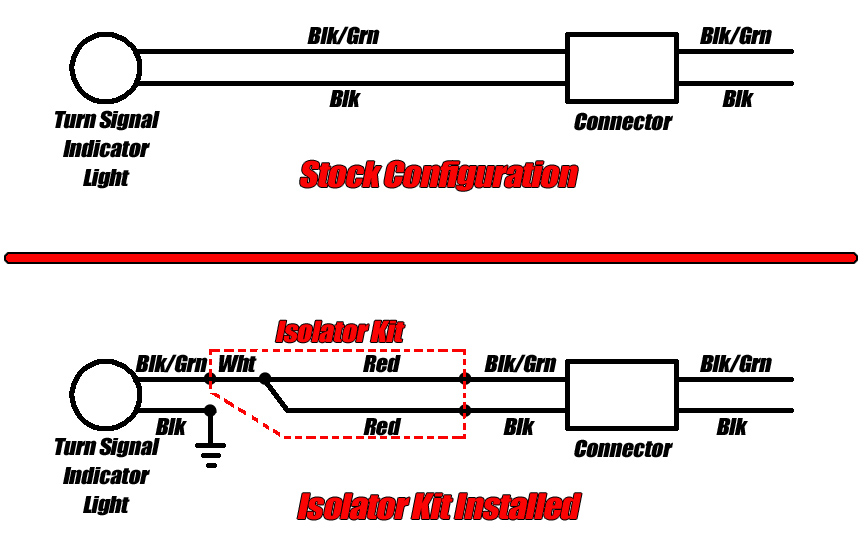
- Below is a diagram that shows how the wiring should work when the work is complete.
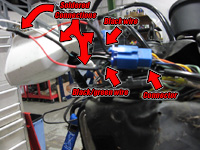
- Instructions on the kit say that you can use either wire for a ground, I used the black wire because that is normally a ground. If you slide the black wire out of the plastic tubing, then you can splice the short piece of black wire provided in the kit onto the existing black wire. I then installed a lug on the end and grounded it to the frame as shown in the image below.
- That should do it! Test your system. If all was installed correctly, you should now be able to see the dashboard indicator light when the signals are on, regardless of which side.
If you have any questions, please feel free to give us a call at 541-688-9543. Or you can send us an email (info@procycle.us).