I've long been curious about the DR650 rear shock and have wanted to understand more about how the linkage affects shock action. Typically, a shock linkage has a rising rate to help the shock resist bottoming while still having a compliant spring rate. How is this accomplished on the DR? The only way to answer that question is to get some measurements, crunch the data and see what is really happening. Luckily I just attended the Race Tech Advanced Suspension Seminar where we did some hands-on calculation of linkage leverage ratios.
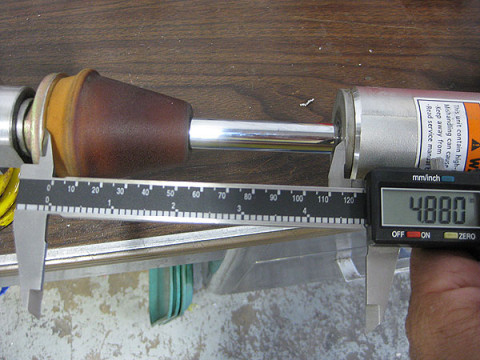
First, we have to be able to move the shock through it's travel easily. I removed the spring from the shock and released the nitrogen.
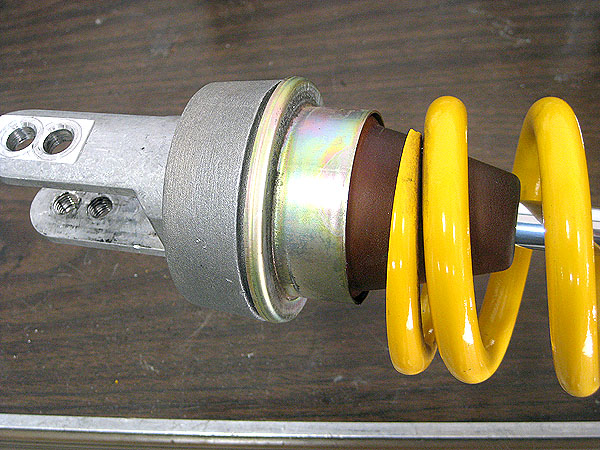
Here's something interesting already. If we ignore the bottoming bumper the shock has about 4-7/8" of total travel but the bottoming bumper contacts the shock body after the first 2-1/2" is used.

That means the bottoming bumper is active any time the shock goes much past the first half of travel.
If your bike is set up with the typical 30% of sag you are working your bottoming bumper all the time.

Next, we set the bike up so we can measure wheel travel in accurate increments.
Here, I have the end tape measure resting on top of the axle and am measuring to the bottom edge of the rack mount.
In this pic our measurement is 48 centimeters.
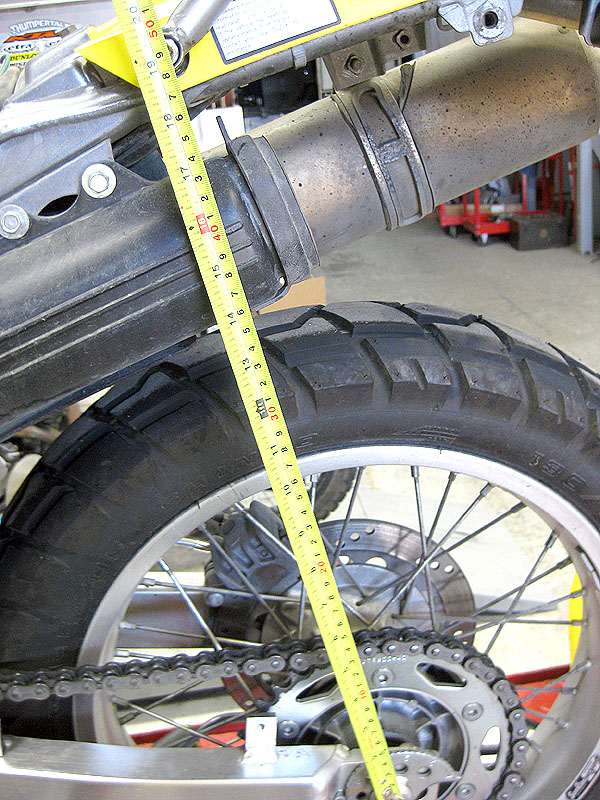
I'll move the wheel up in 1 centimeter increments and measure the travel at the shock absorber.
I used a scissor jack to accurately lower the bike and recorded the shock travel at each centimeter of wheel travel.
I don't know how much the bottoming bumper actually gets crushed but I'm guessing down to about 20mm.
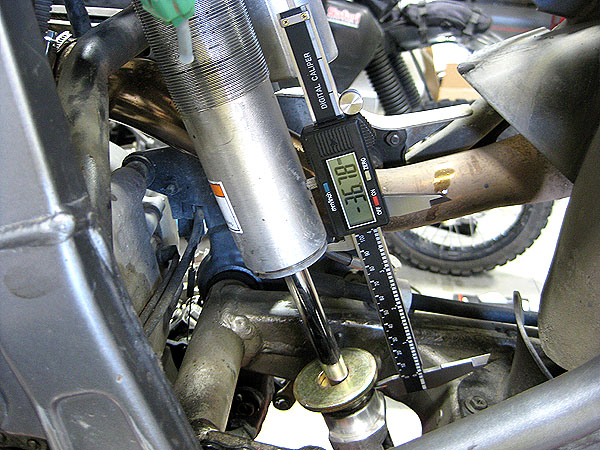
I went ahead and made measurements all the way down to end of the possible shock travel.
The bottoming bumper is contained in a sheet metal 'cup'. The cup prevents the bumper from being squashed out into the spring coils.
That cup is 20mm tall so I think it's likely that the DR shock never uses the last 20mm of travel. That would pretty much stop wheel travel at 9"
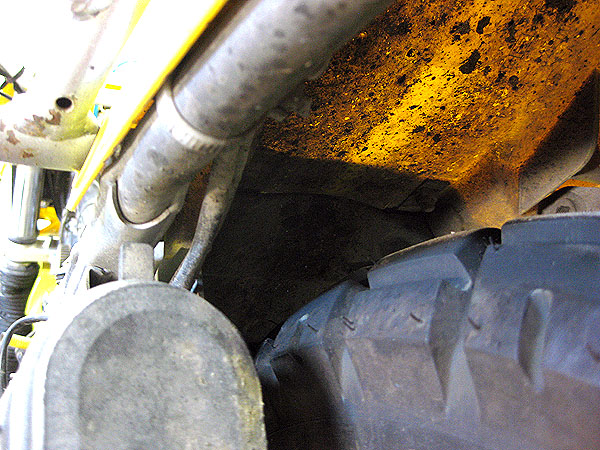
At the point where the bumper is mashed down to 20mm there is about 60mm clearance between the tire and the fender.
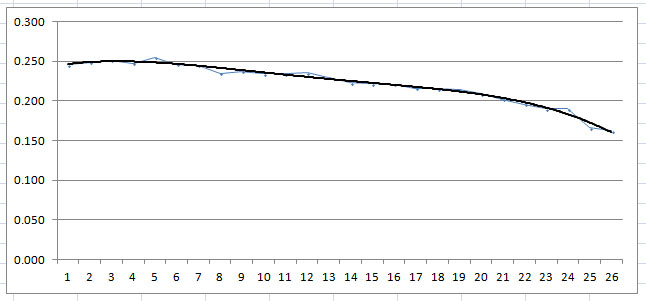
With the numbers plugged into a spreadsheet I can calculate the incremental displacement of the shock and the leverage ratio. We can also plot a graph showing the change in leverage ratio (rising rate).
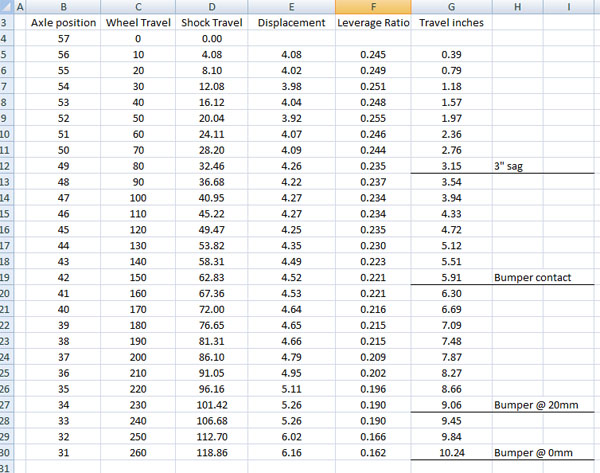
There are a few things that stand out:
- The bike can only use all of it's advertised travel if the bottoming bumper is smashed to oblivion!
If we use my 20mm guesstimate as the practical limit for mashing the bottoming bumper we really only have 9" of usable wheel travel.
A 'factory lowered' bike will end up with about 8" of usable wheel travel.
- The linkage ratio rises, but not very much, and it is pretty linear until the very last bit of travel.
- From the 'rider sag' position to contact with the bottoming bumper is only about 3" of suspension travel.
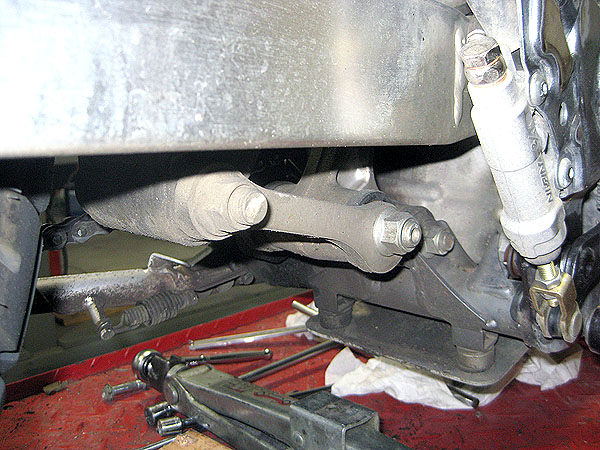
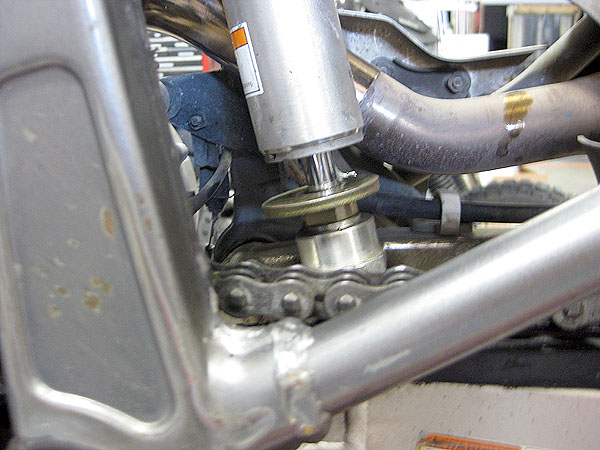
If the shock wasn't there to halt upward travel of the wheel the linkage also has a limit to how far it can extend.
When these three bolts are in a line the swingarm can no longer move up (without damaging something!)
It will only get to this position with the shock removed. At this point there is about 1" of clearance between the tire and fender.
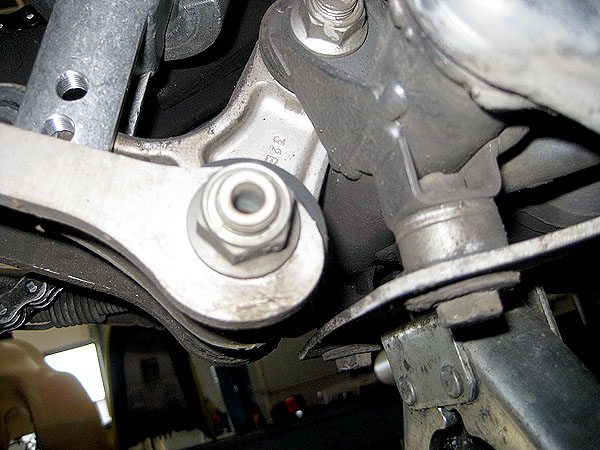
The linkage also limits downward travel. In this photo the shock is not attached and the wheel is off the ground.
The linkage knuckle hits the frame. The shock tops out just barely before this happens.
In fact, from this position you only have to lift the wheel 5mm to slip the lower shock bolt in place.