Required Tools:
- Hacksaw
- 12mm wrench (or socket w/ratchet)
- 6mm Allen Wrench
- File or Grinder
- Needle-nose pliers
- Adjustable-end wrench
Bracket Modification:
You will not be able to re-use the stock footpeg brackets after this modification!
Read the instructions carefully before starting. If you do not have all the required tools or are not comfortable performing the work involved, have a mechanic install the footpegs for you.
- Remove the existing footpegs by removing the c-clip from the peg pivot pin.
- Remove the footpeg brackets from the frame using a 12mm wrench.
- Clamp the footpeg bracket securely in a vise.
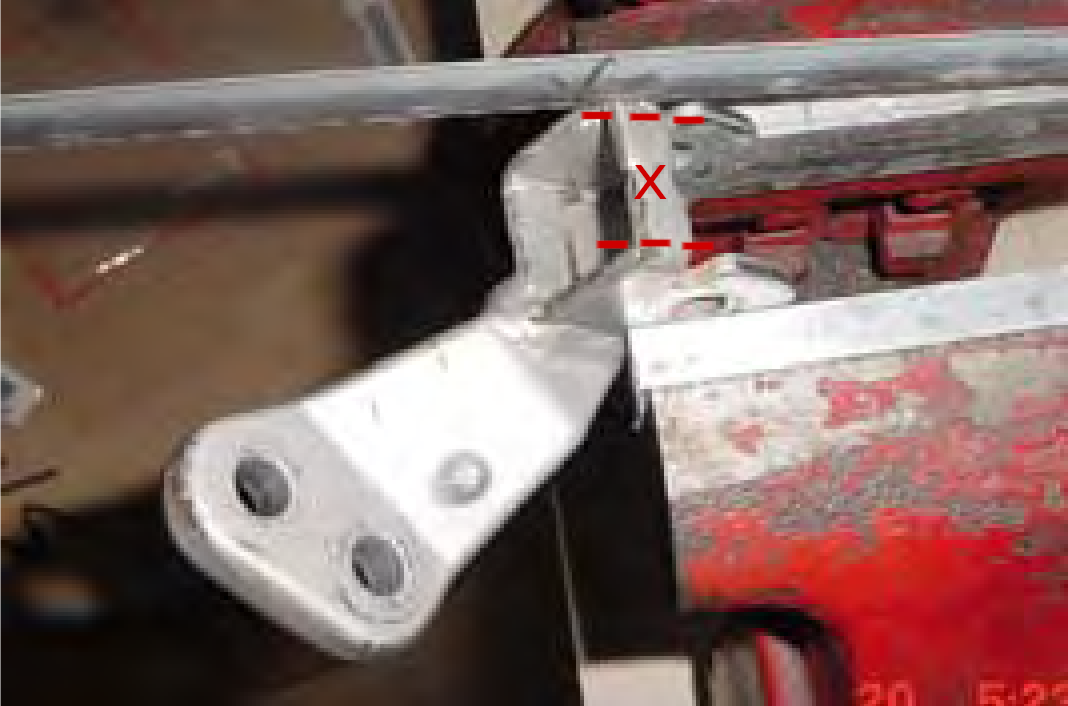
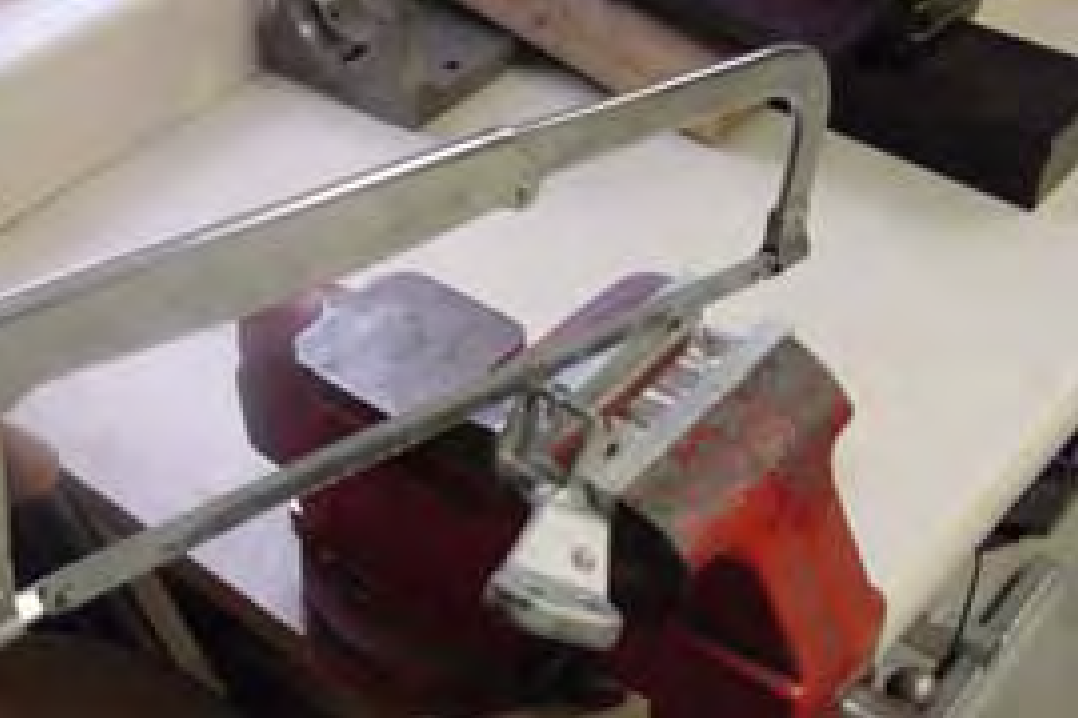
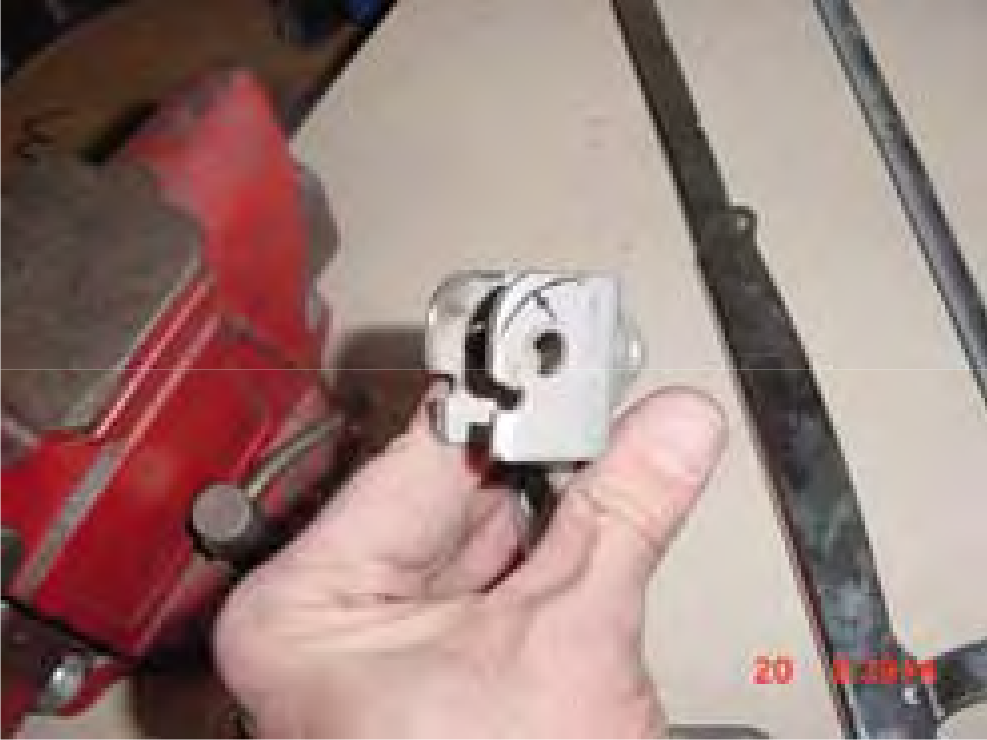
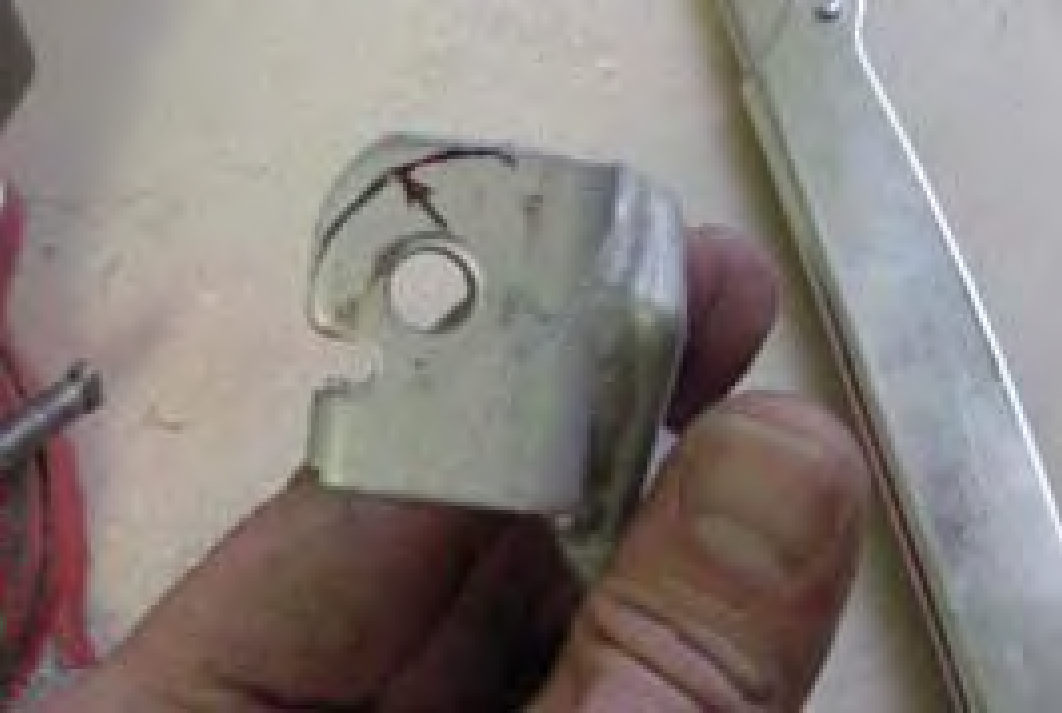
- Using a hacksaw, remove the portion connecting the front and back of the footpeg bracket as shown in Figure #1. Figure #3 shows the bracket after removal of the portion connecting the front and back of the bracket.
The next step is to file or grind the footpeg bracket to allow the new peg to rotate in the bracket. Mark the footpeg bracket as shown in Figure #4 with a constant radius starting at the indent in the peg bracket. Grind the footpeg bracket to this line. Be careful not to grind too much material as this will weaken the bracket. Grind only enough to allow the peg to rotate freely. NOTE: You only need to grind the side of the bracket that faces toward the front of the bike when the bracket is installed. However, it will not effect installation if both sides are ground. (If this is unclear, install the peg into the bracket and determine the part of the bracket that is preventing the peg from rotating upward as shown in Figure #5)
When the bracket is ground properly, the peg should rotate in the bracket until the stop on the inner part of the peg hits the bracket.
Using the file, remove all sharp edges from the area ground to provide clearance.
It is recommended that you paint the footpeg brackets prior to installation to prevent rust and corrosion. Krylon® “Dull Aluminum” is a very close match to the stock silver color.
Reinstall the footpeg brackets onto the bike. Use a thread locking compound and tighten to factory specifications.
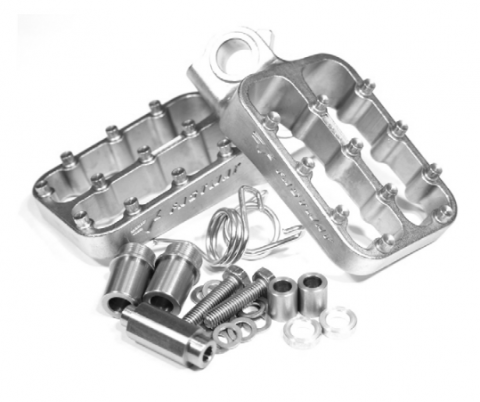
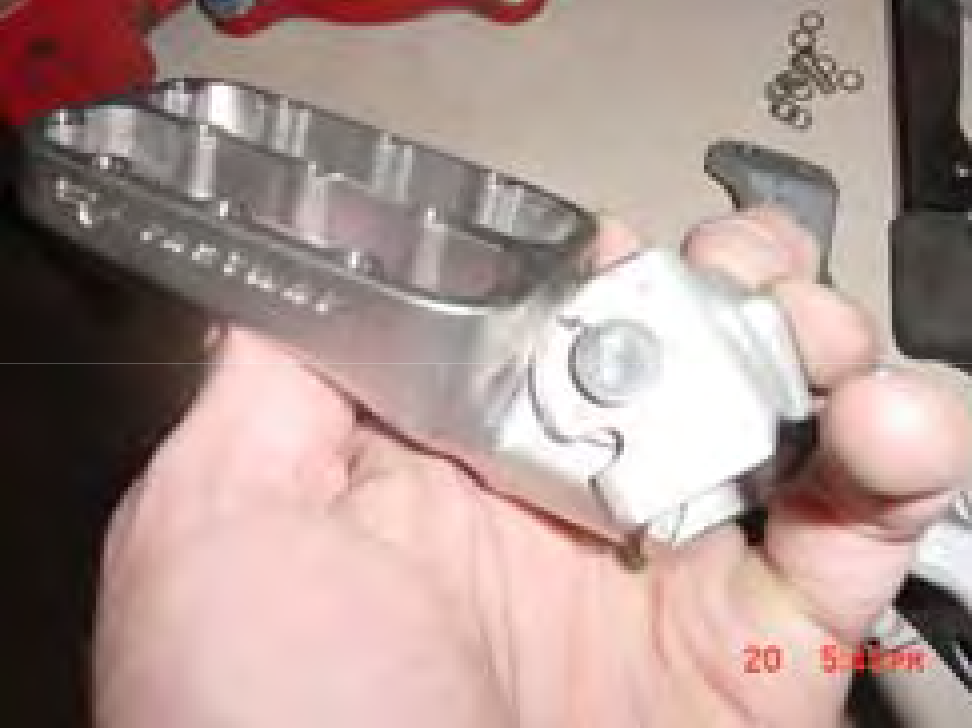
Using the supplied Fastway Evolution II Footpeg Installation Instructions, assemble the footpeg collars and FKMS spacers and install on the brackets.
Footpeg Installation:
- The Universal Collar System enables you to set up the footpeg up at either the standard stock position or in a lower configuration. Insert the collar in the footpeg mounting hole from the bottom for a
(standard) stock peg height, or from the top for the lower configuration which moves the peg down and back. Collars will require a little pressure to install as they are a tapered press fit. This
can be accomplished using the supplied cylinder tool and a vise or hammer. To remove the collar, simply use the supplied cylinder tool from the opposite side.
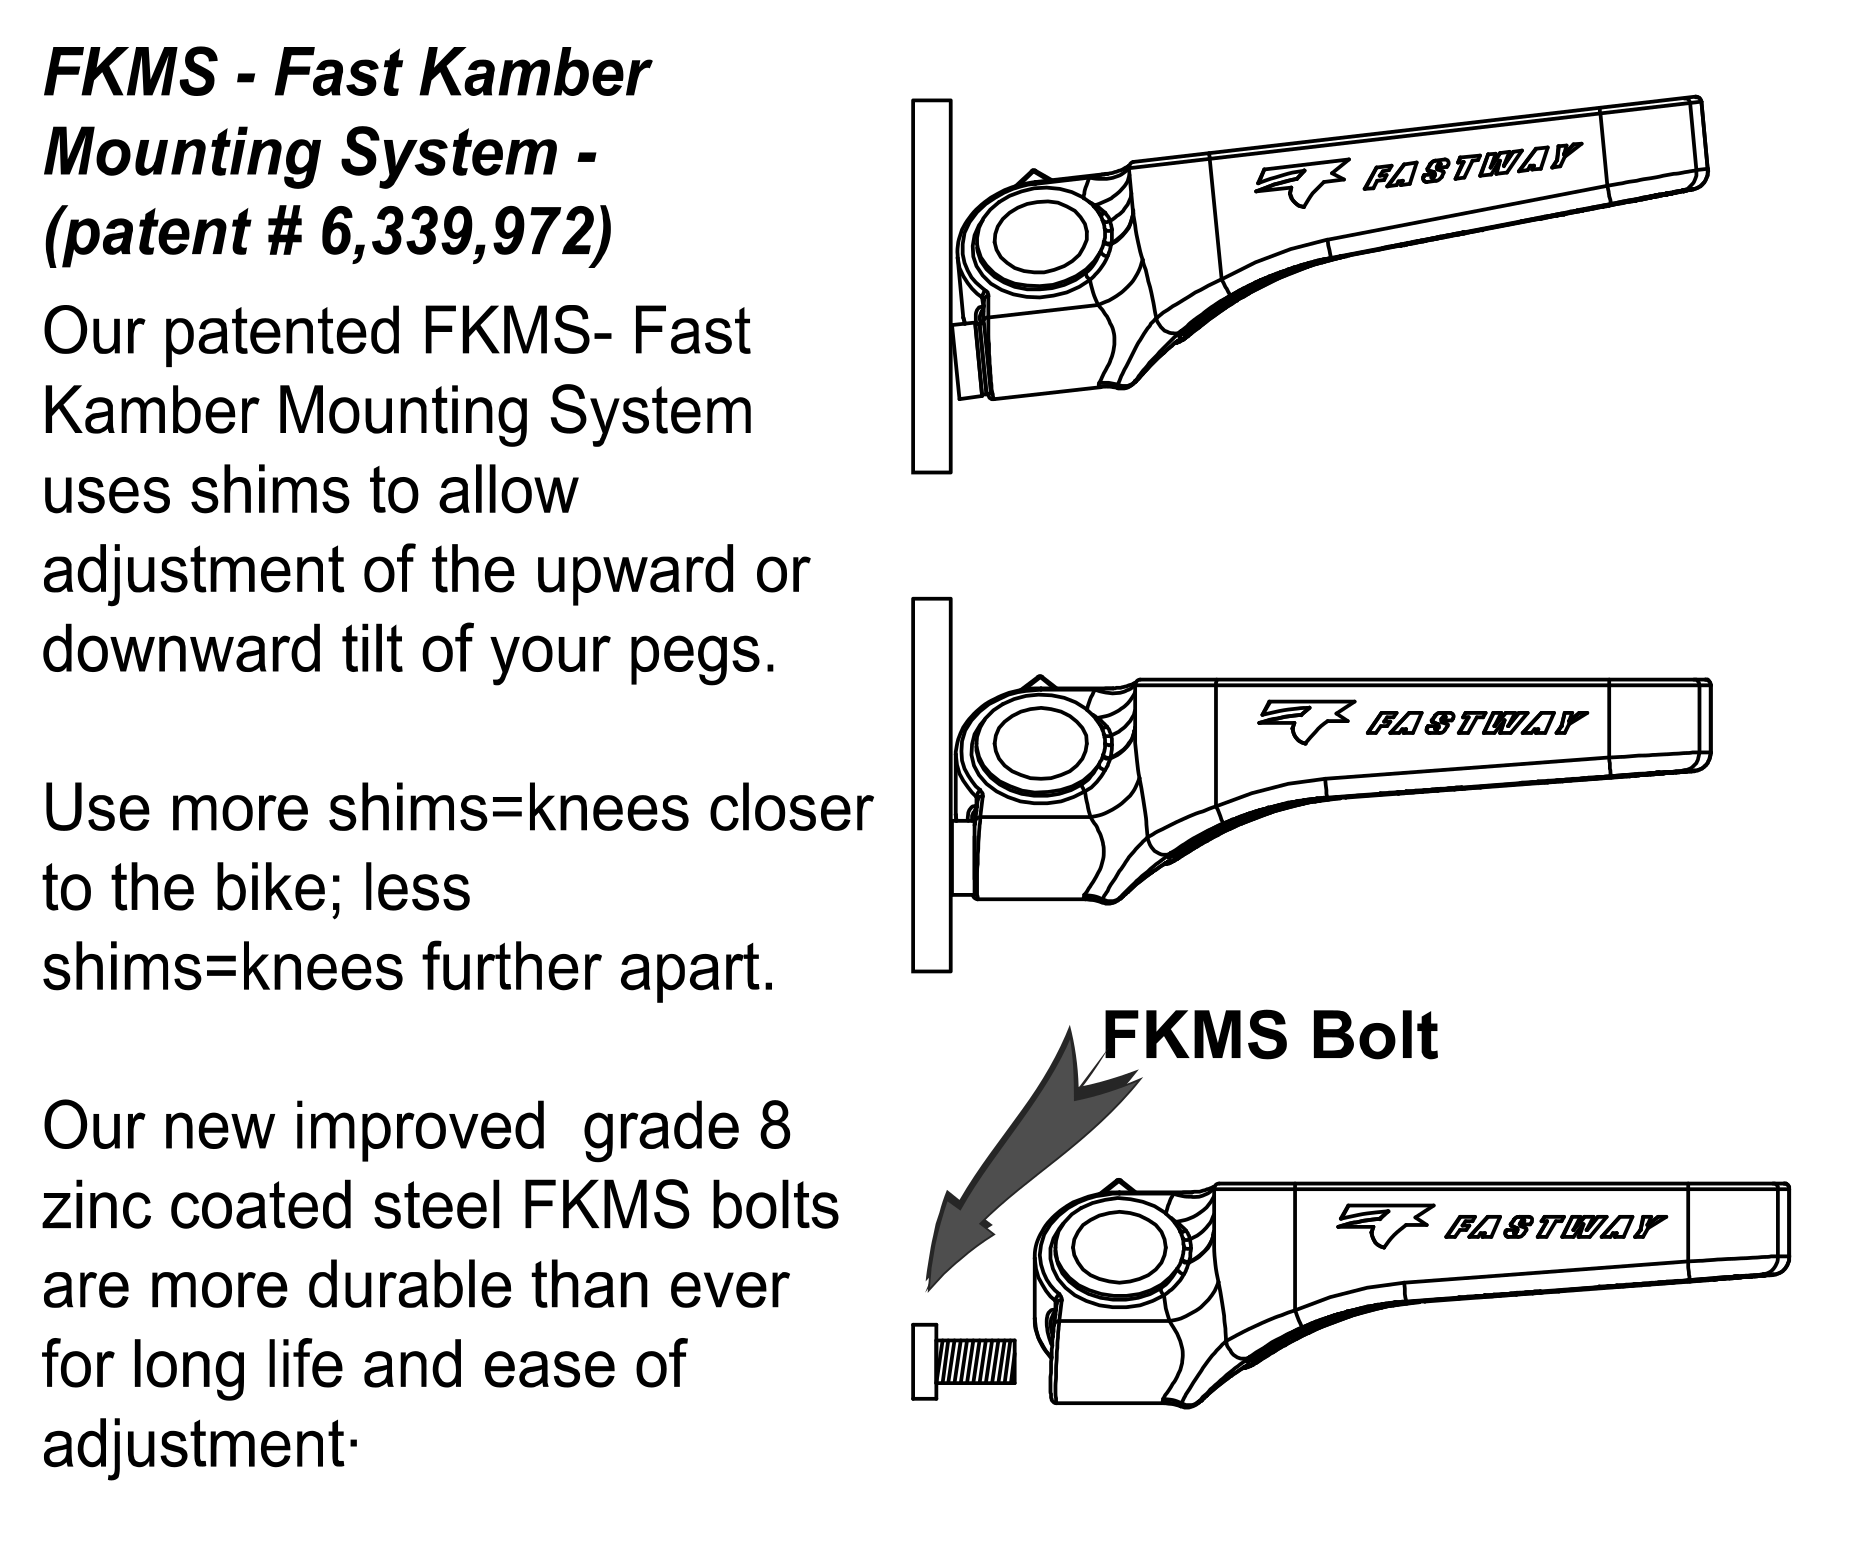
After you have installed the collar in the desired position, install the FKMS (Camber) bolt into each peg. Mount the peg on the bike without the return spring and check the angle of the peg. Add shims behind the camber bolt until the pegs are leveled, or if you choose you can add more shims so you can have a “knee-in” effect which some riders prefer. Once you are satisfied with the mounting position remove the FKMS bolt and clean the bolt and footpeg threads with primer or contact cleaner. Apply a thread locking compound on the bolt’s thread and reinstall. Be sure to frequently check the camber bolts for tightness!
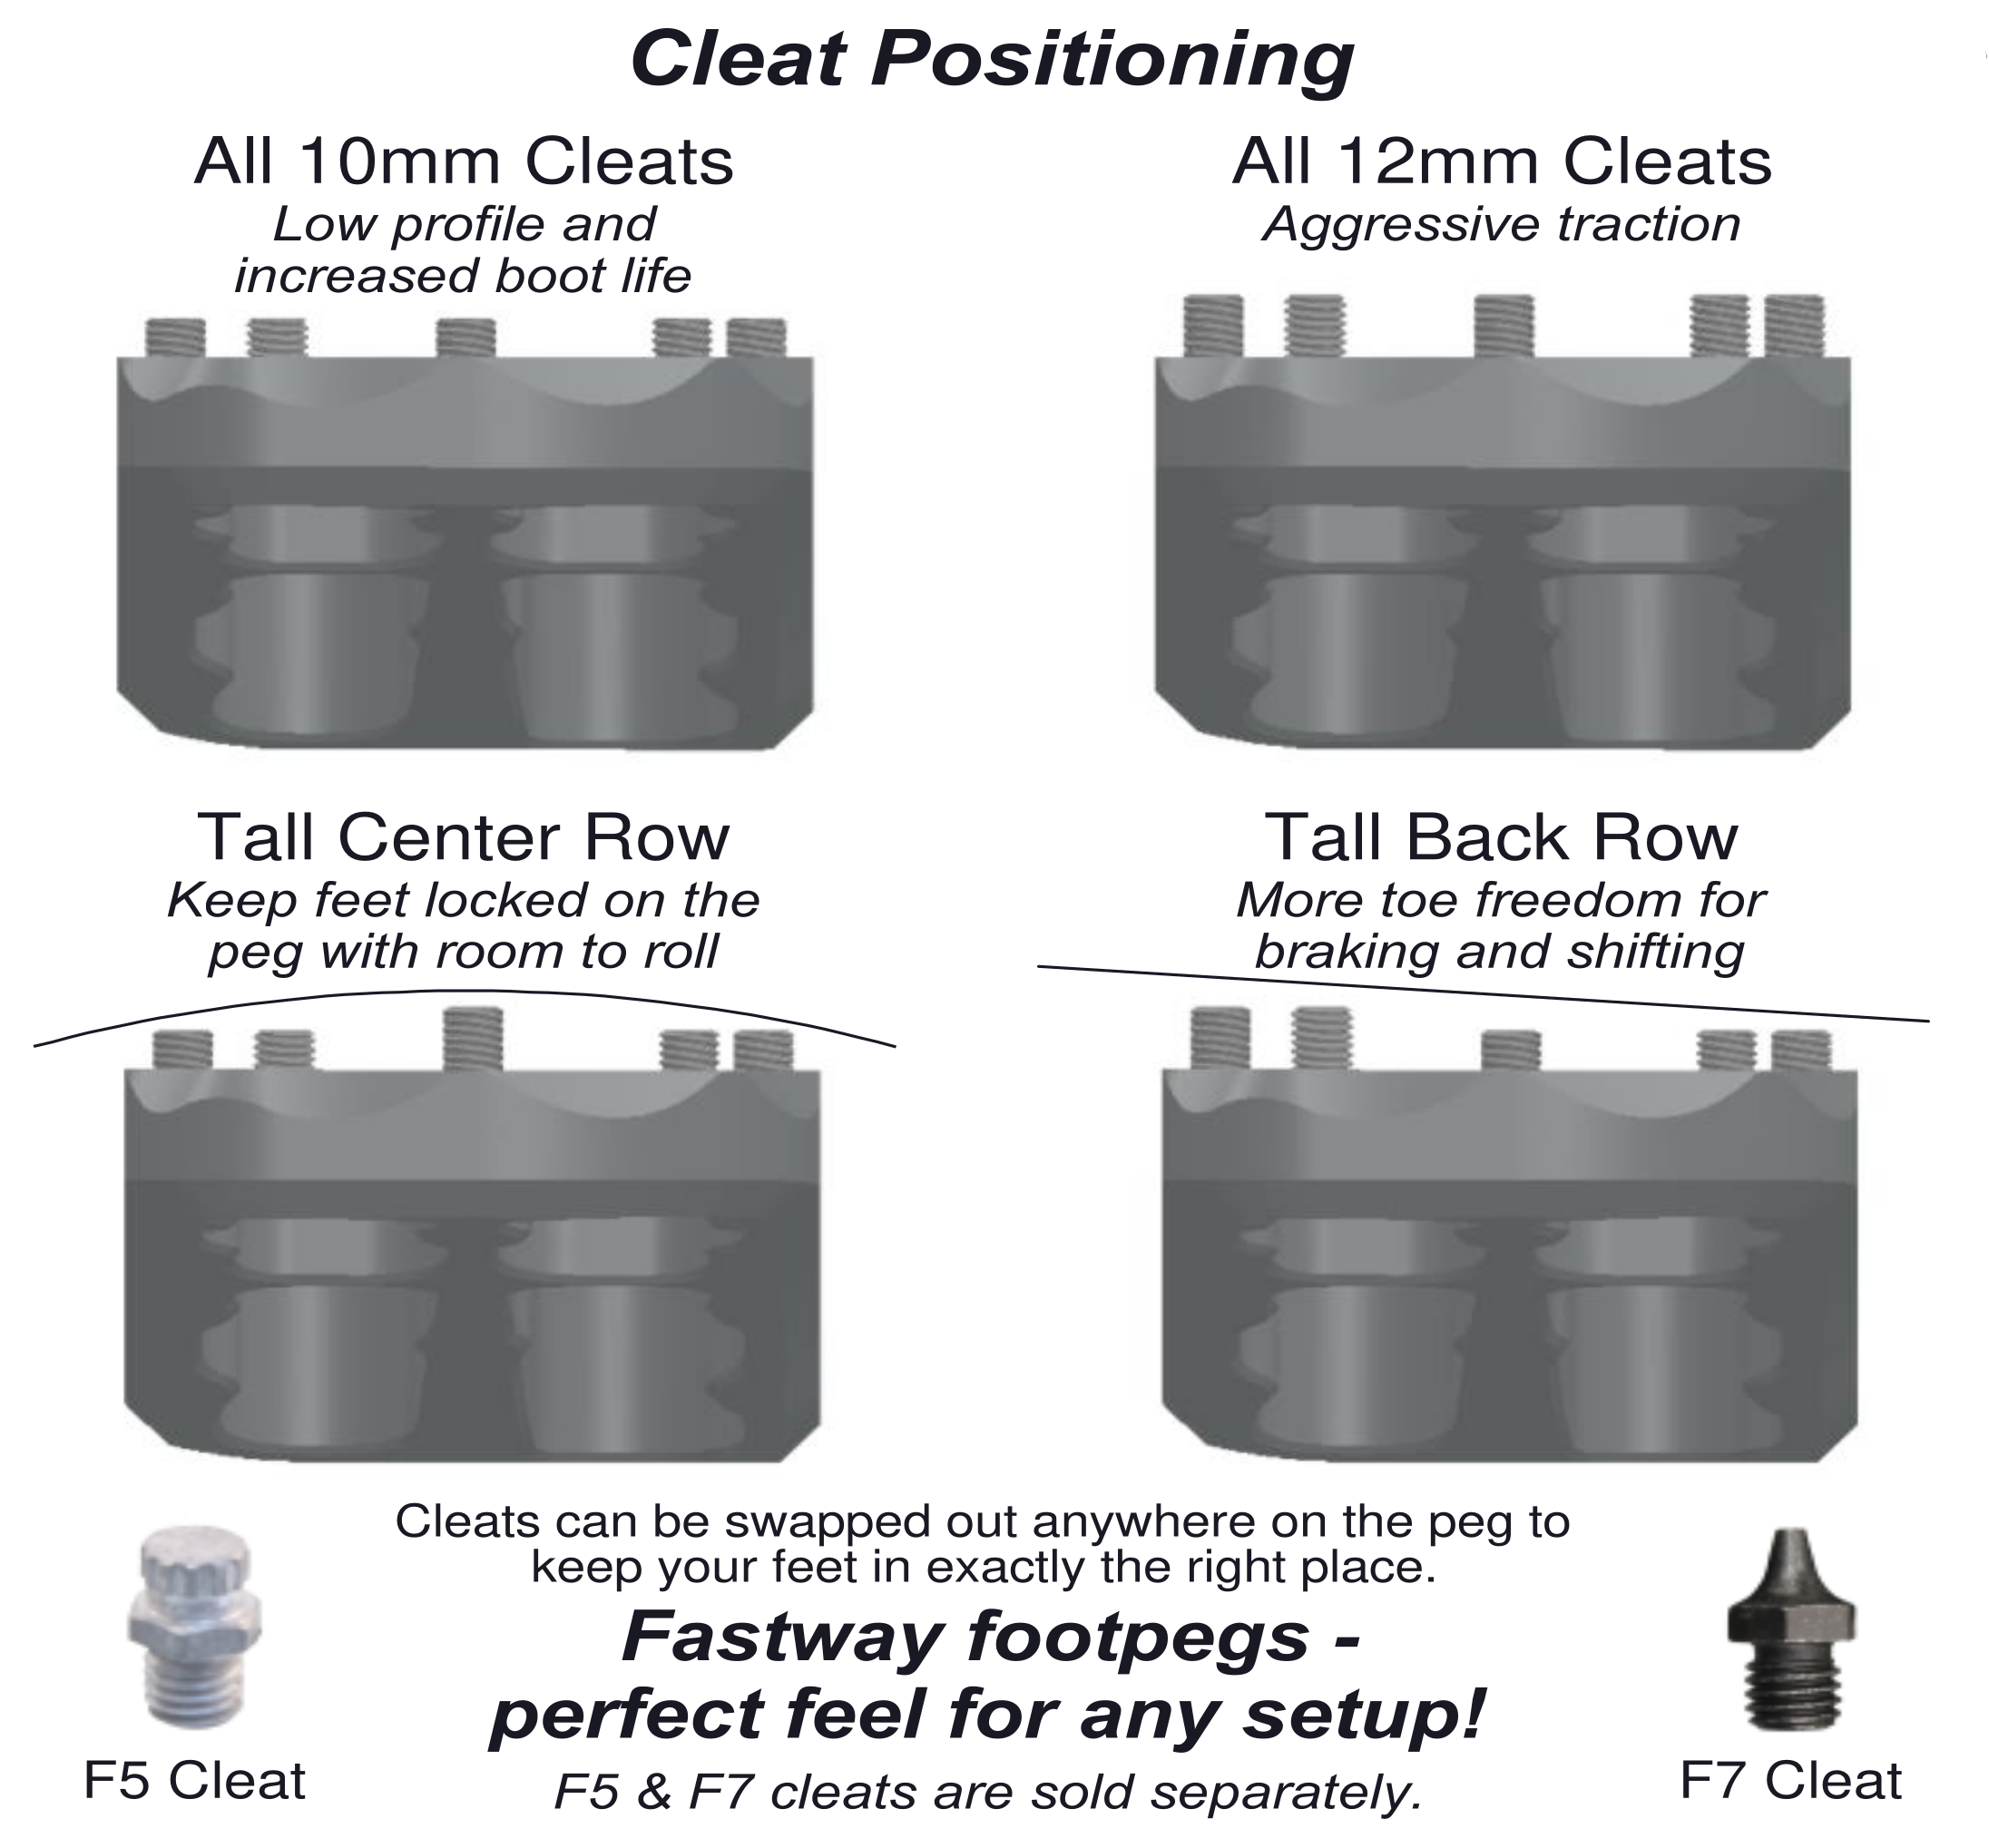
- Install footpeg cleats in the pegs using the supplied thread locking compound. Two sizes are included for additional adjustment.
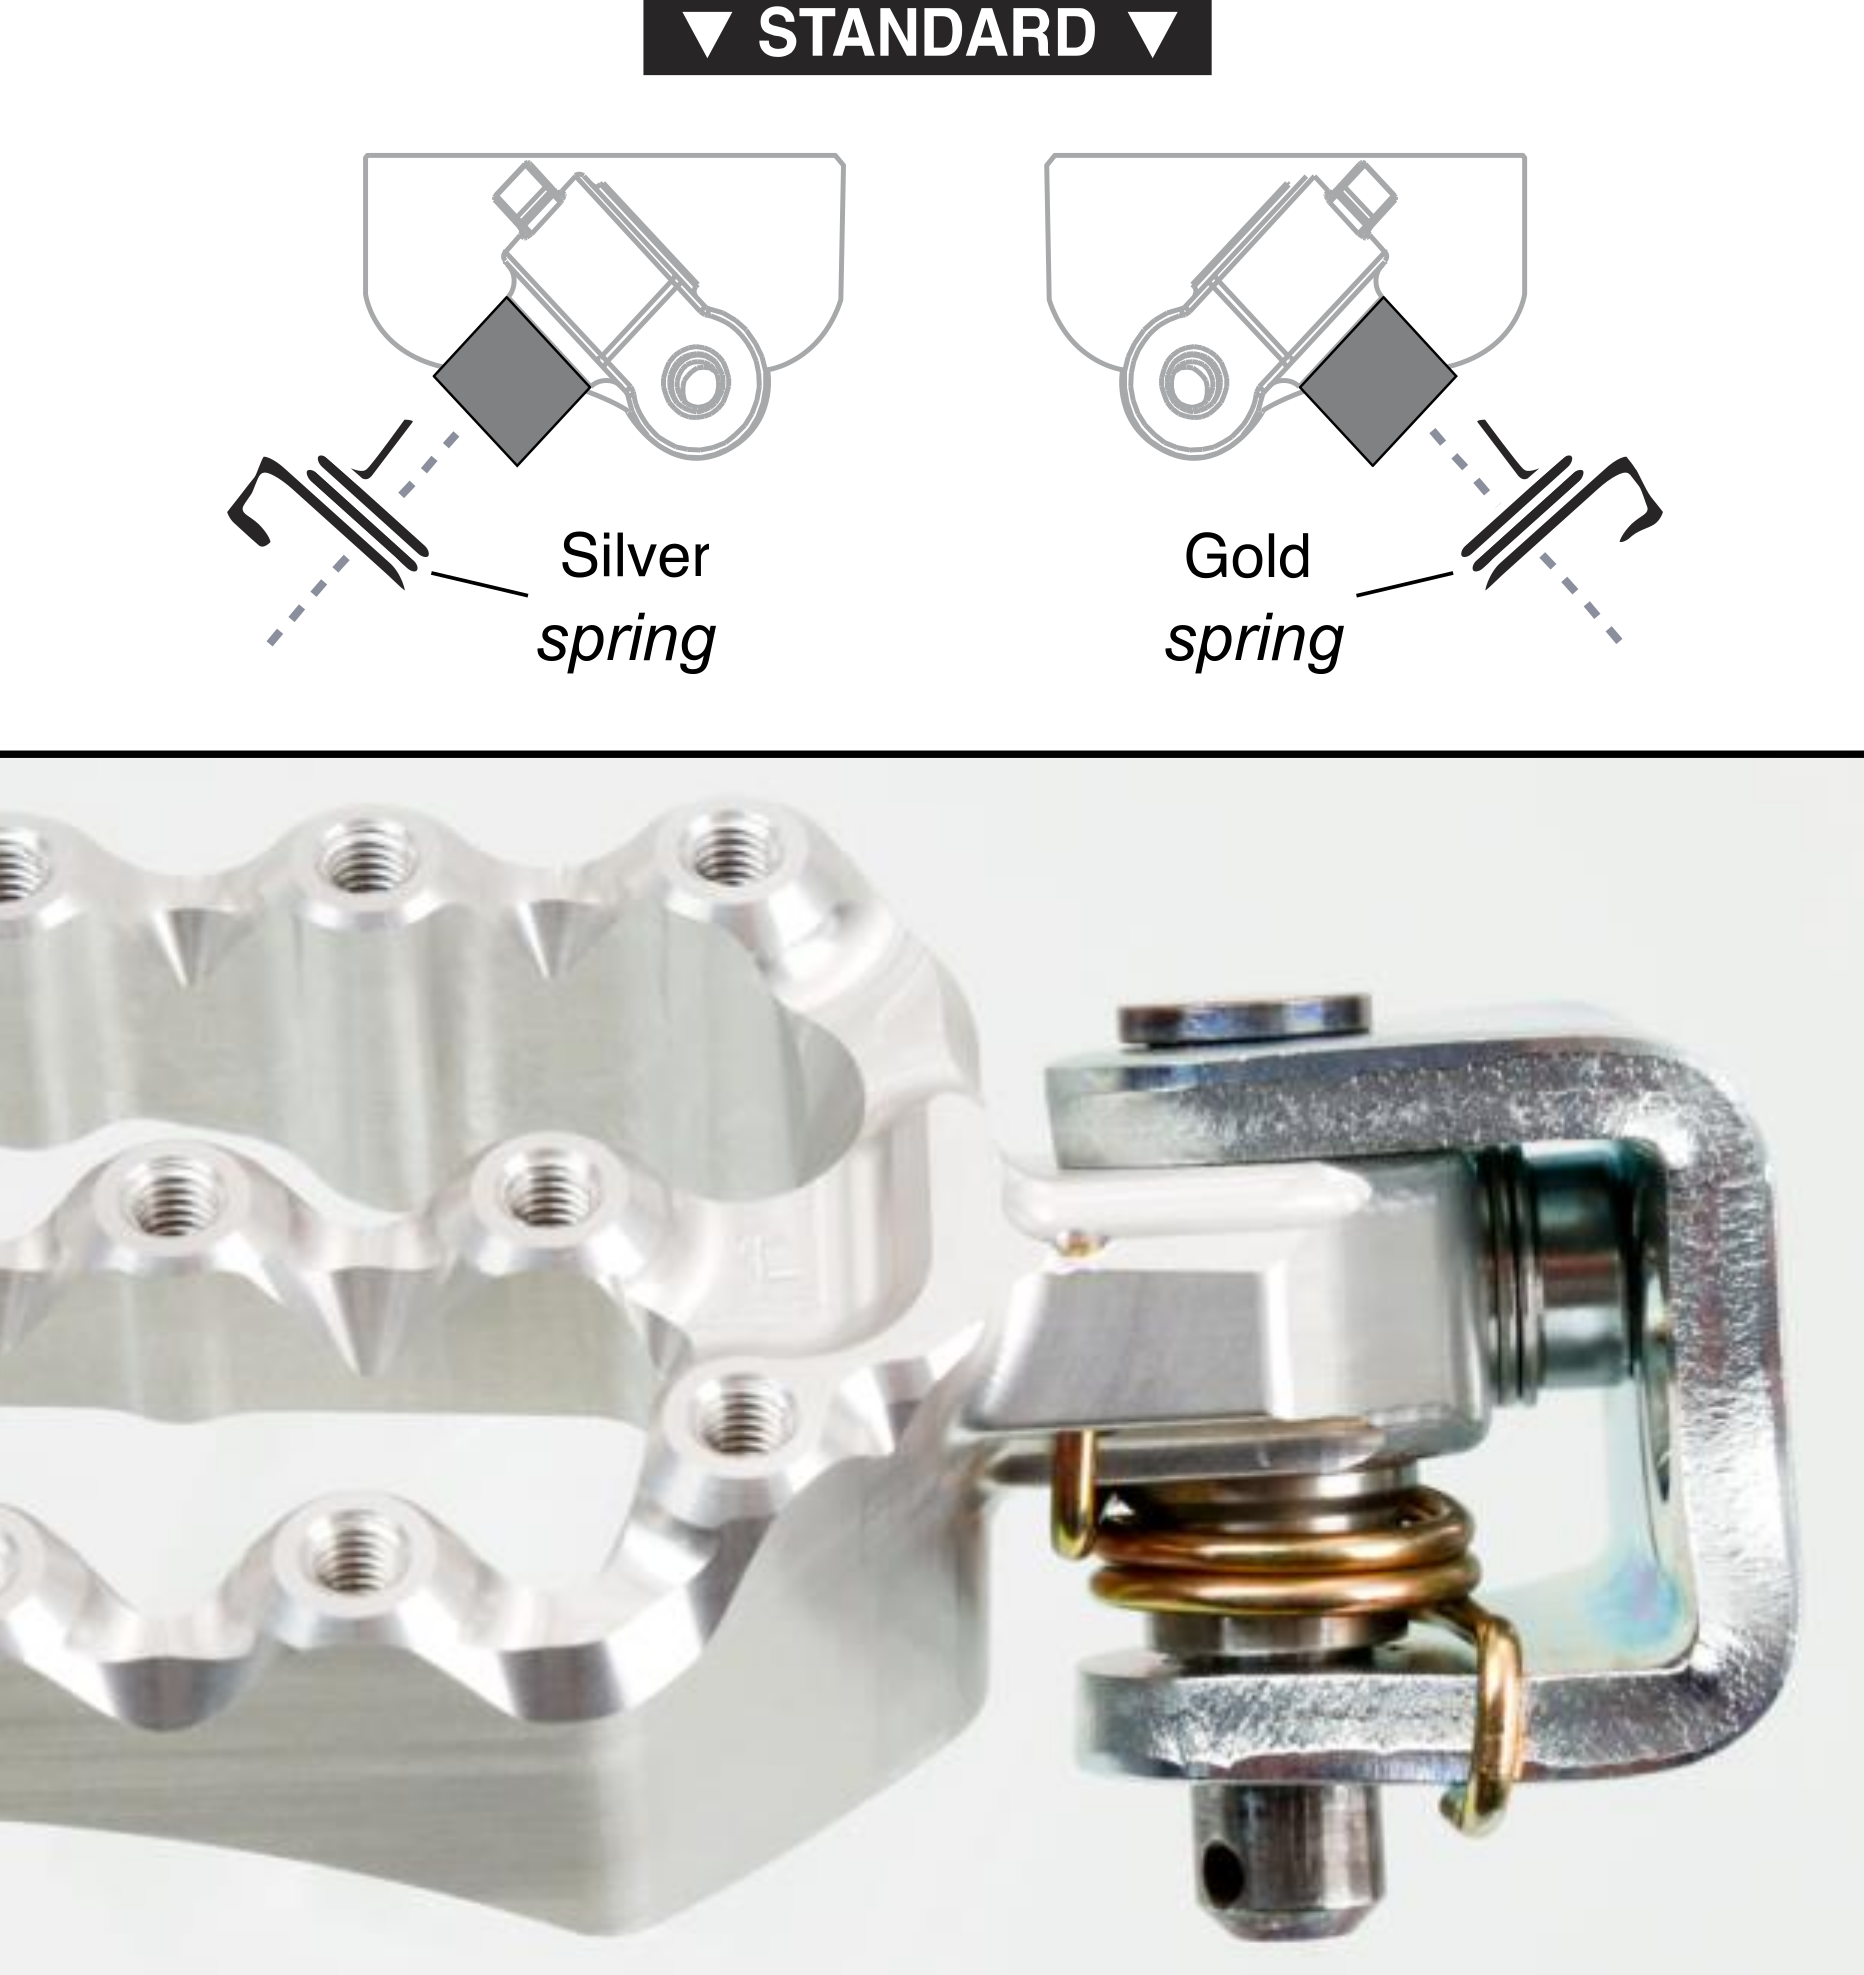
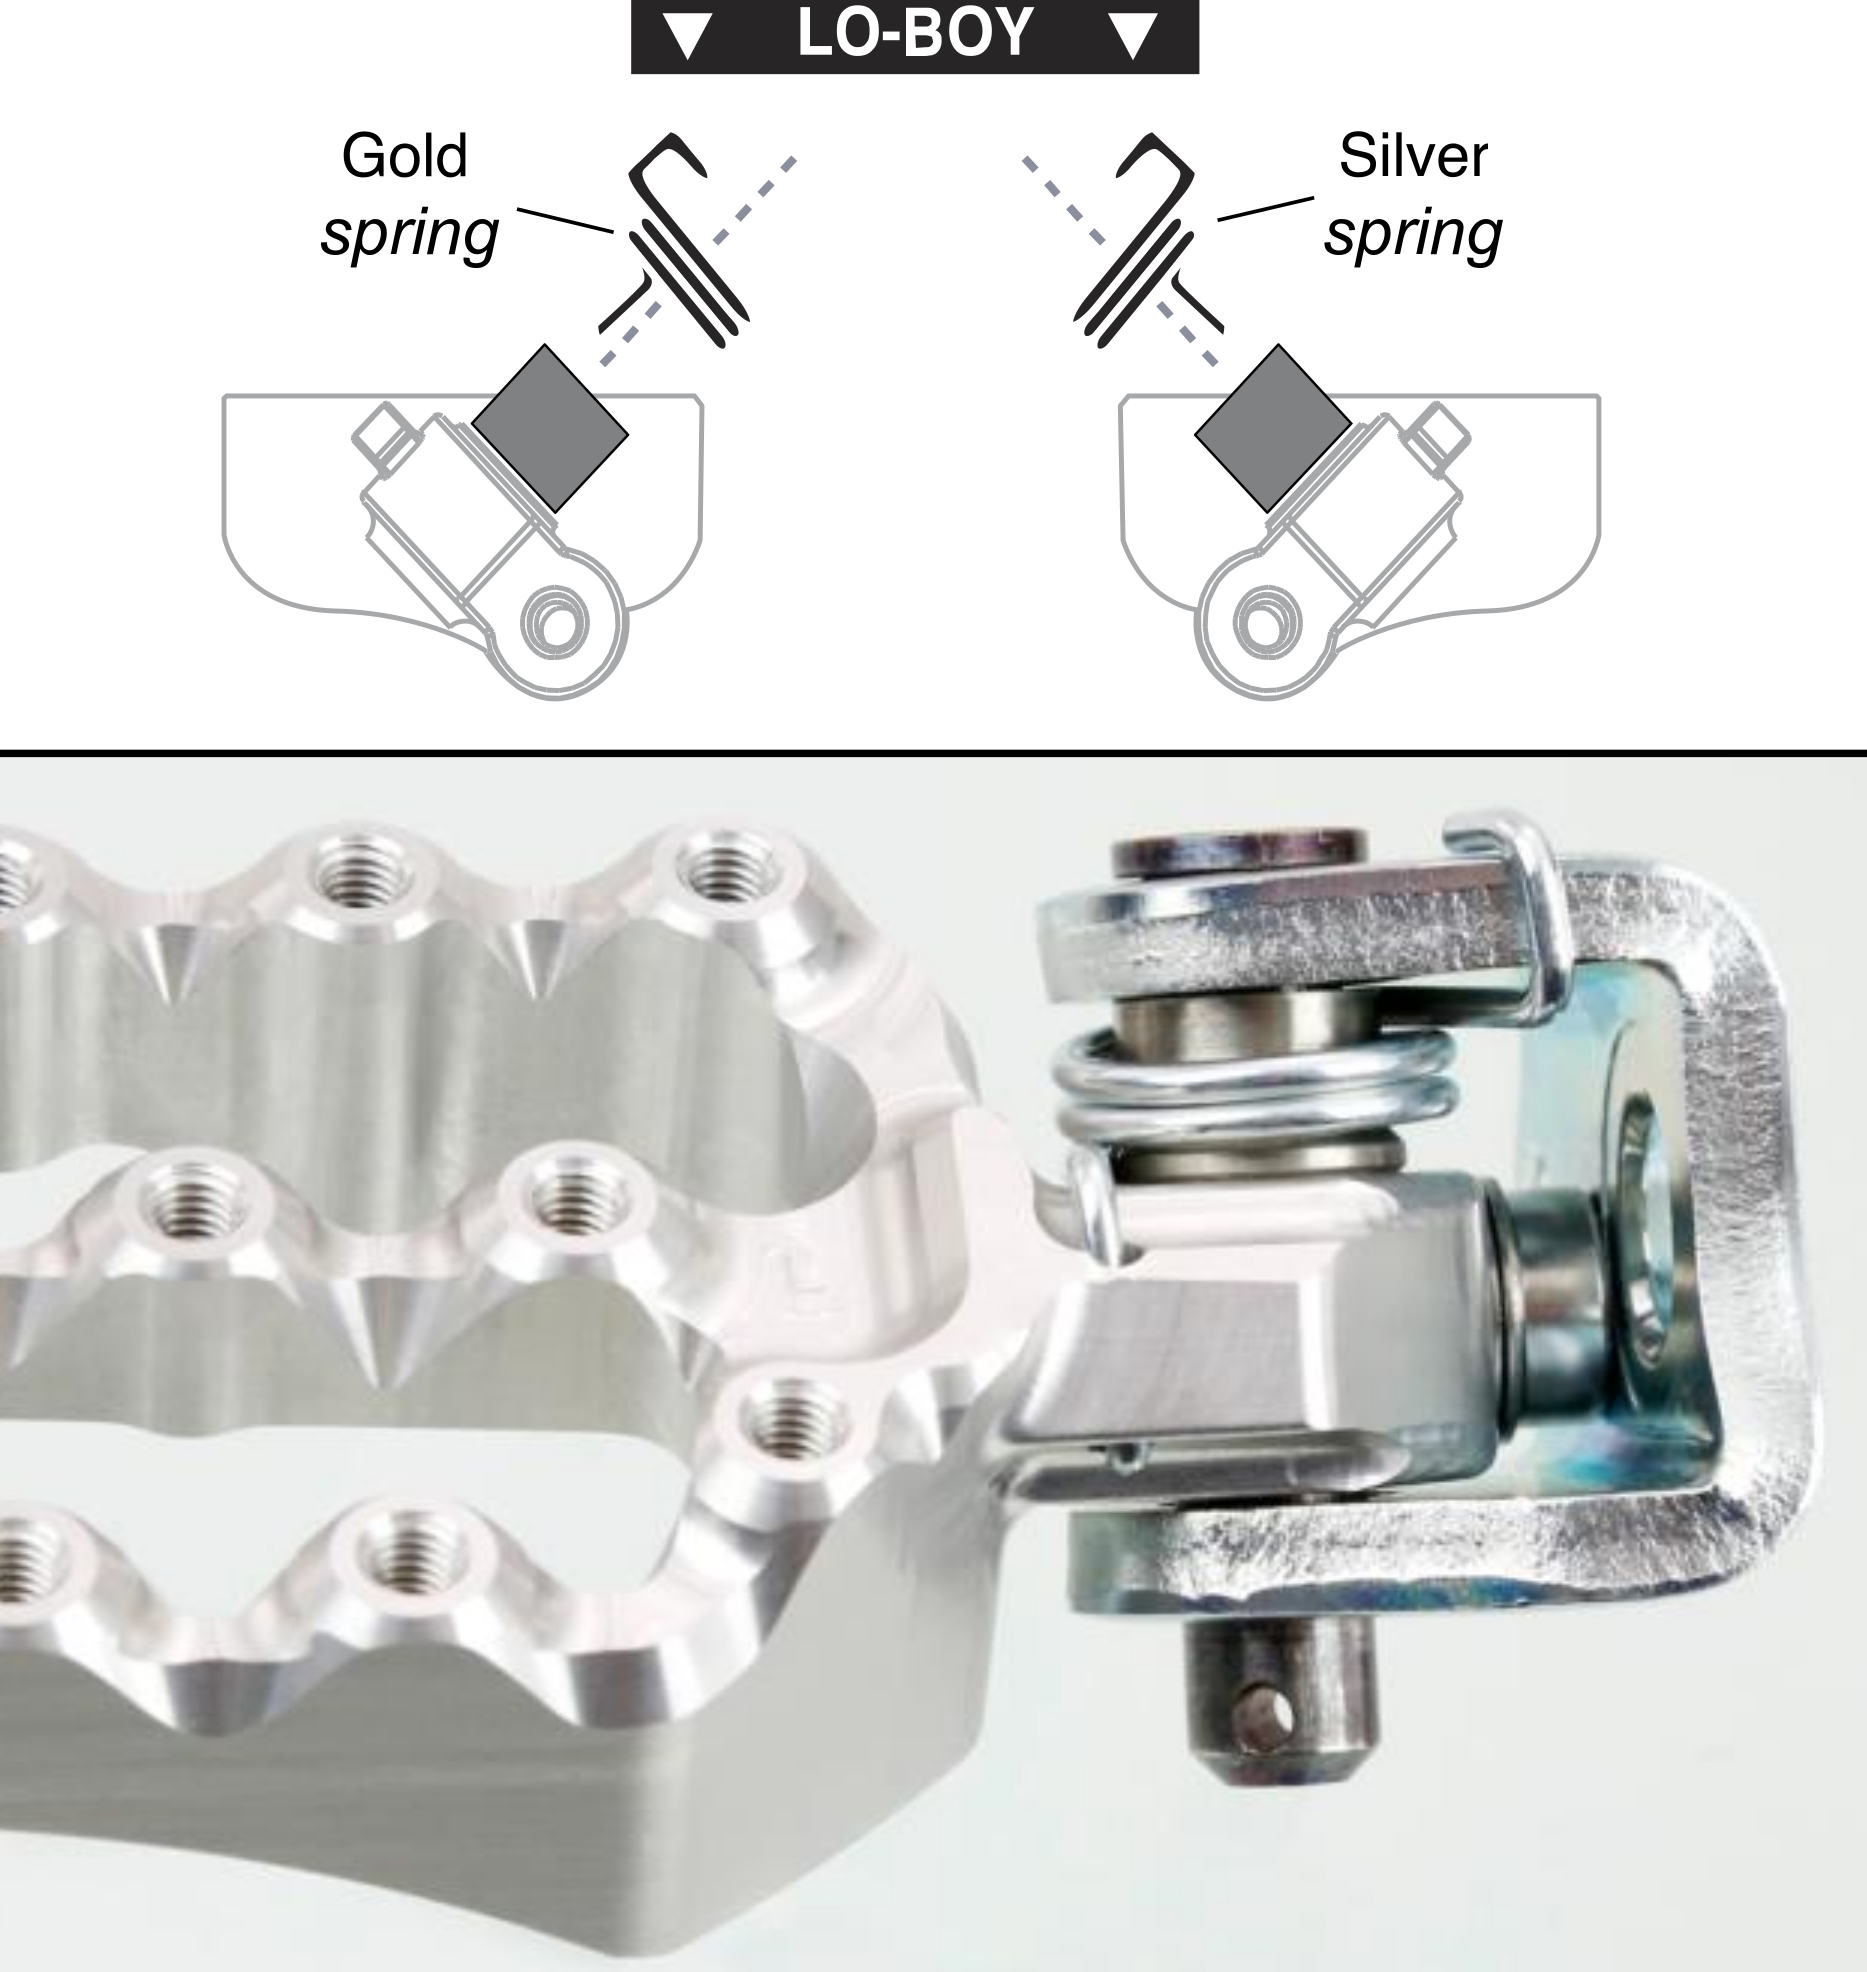
- Mount the pegs to the bike re-using the stock frame pins. Note: Silver spring placement on the right, gold on the left when mounting the pegs in the lower position and silver spring on the left and gold
on the right when mounting pegs in the standard position. Spring placement differs slightly on Adventure or Evolution Air pegs which fit in a milled hole. Some bike models may require the spring to be installed inside the bracket rather than hooked on the edge.
NOTE: After the first ride, re-tighten the footpeg bracket bolts to the factory recommended settings.