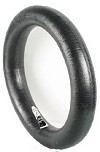
Mounting that Mousse
By Reid Nordin
Don't be fooled that foam inserts are for off-road only! Many factory MX teams are using them now in an effort to reduce flat tire related DNFs or lengthy pit stops. Some riders prefer the handling characteristics of inserts over tubes. Europeans have been using them for years and the top Six Day riders can mount two of them faster than most people can mount a tire with a standard tube. So when you're ready to tackle the task of mounting the beasts, take these hints into consideration.
If you're looking for speed while doing this, forget it, speed equals practice just like anything else you try on your bike.
1. Size Matters: Make sure the foam insert you select is the right size for the intended tire.
2. The Right Tools for the Job: This job will be much easier if you have the right tools to assist you, it also can't hurt to have too many. Sometimes a third hand also helps.
3. Lube It: Mousse lube and tire mounting lubes are the best types of lubes to use. They'll keep the friction down between the tire and foam insert, which helps reduce heat. Heat kills foam inserts faster than anything. Lube both the foam insert and the inside of the tire.
4. Prep your Rim: This is the perfect time to remove the rubber band and tape up your clean rim. Only leave one hole in your rim exposed, you won't need the one for the valve stem and the tape will seal out the dirt and mud.
5. Get Started: Mounting the first bead can be tricky as the rim and tire are very slippery from the lube. Once this bead is on you'll need to use a little force to get the tire and insert centered on the rim, then all of your tools come in handy. The foam insert will try and force the bead to seat at all times and that is why you'll need all of the tools to keep it from
popping up until you're ready. Vise grips can be used to hold the bead down but be careful this might scar your rim.
6. Don't pinch: Just as you don't want to pinch a regular tube (for obvious reasons), you want to try and avoid it with the foam insert also. Cuts and nicks will cause the insert to break down prematurely, causing tire failure.
7. Save the Lock for Last: Slowly work your way around the tire making sure the bead has not popped up on either side. Once you get to the bead lock area it will take some force to push the bead lock in while getting that last bit of tire on the rim.
8. New or Used: If you chose an old or used insert and the bead did not seat by itself, simply apply some air through the valve stem hole with a blow nozzle which should force up the last bit of bead.
9. Believe It Or Not: Now that you have accomplished this remember that some say it's even harder to dismount a foam insert!