Important: All appropriate safety equipment and gear must be used during the installation of this or any other ProCycle product including any time you work on a vehicle. ProCycle accepts no responsibility for injuries or damage incurred during the installation of any products.
Be safe – no smoking or open flame. Don’t get gasoline on your skin. Wear eye protection. Use ventilation to avoid buildup of explosive fumes.
(See available PDF for printable version with illustrations and airbox template)
Installation
We highly recommend having a service manual on hand for carburetor removal and installation details.
- Drain the fuel from carburetor and remove the carburetor from the bike.
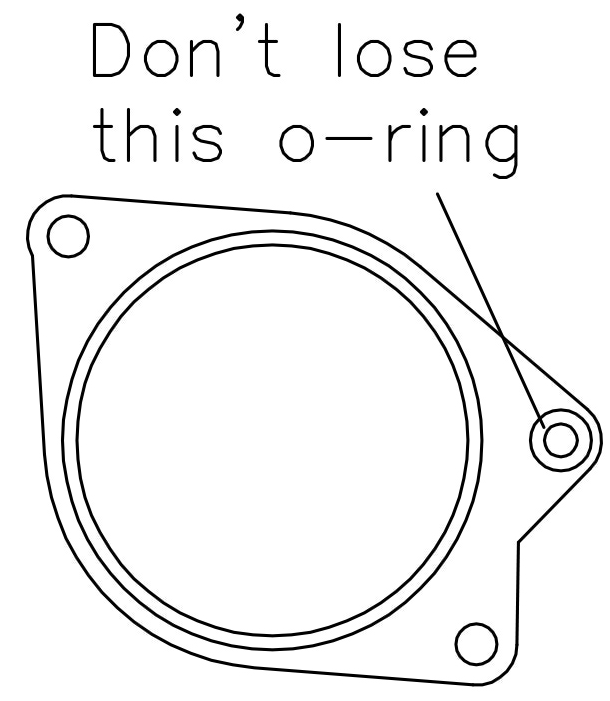
- Remove the top cap and the slide. Don’t lose the little O-ring under the top cap.
- Remove the needle, clip and plastic spacer. Set these aside, you won’t need them again.
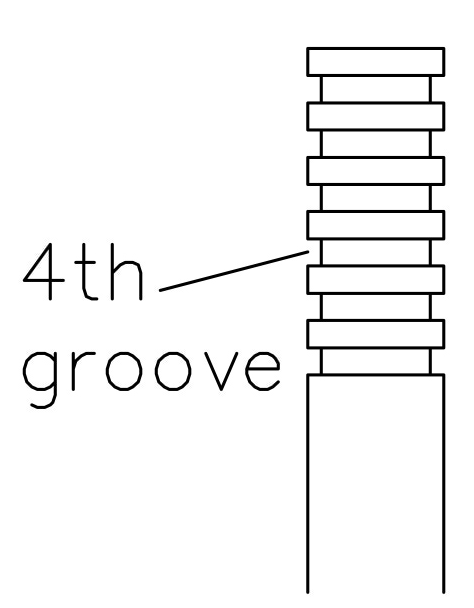
- Install the E-clip on the 4th groove counting down from top of the needle.
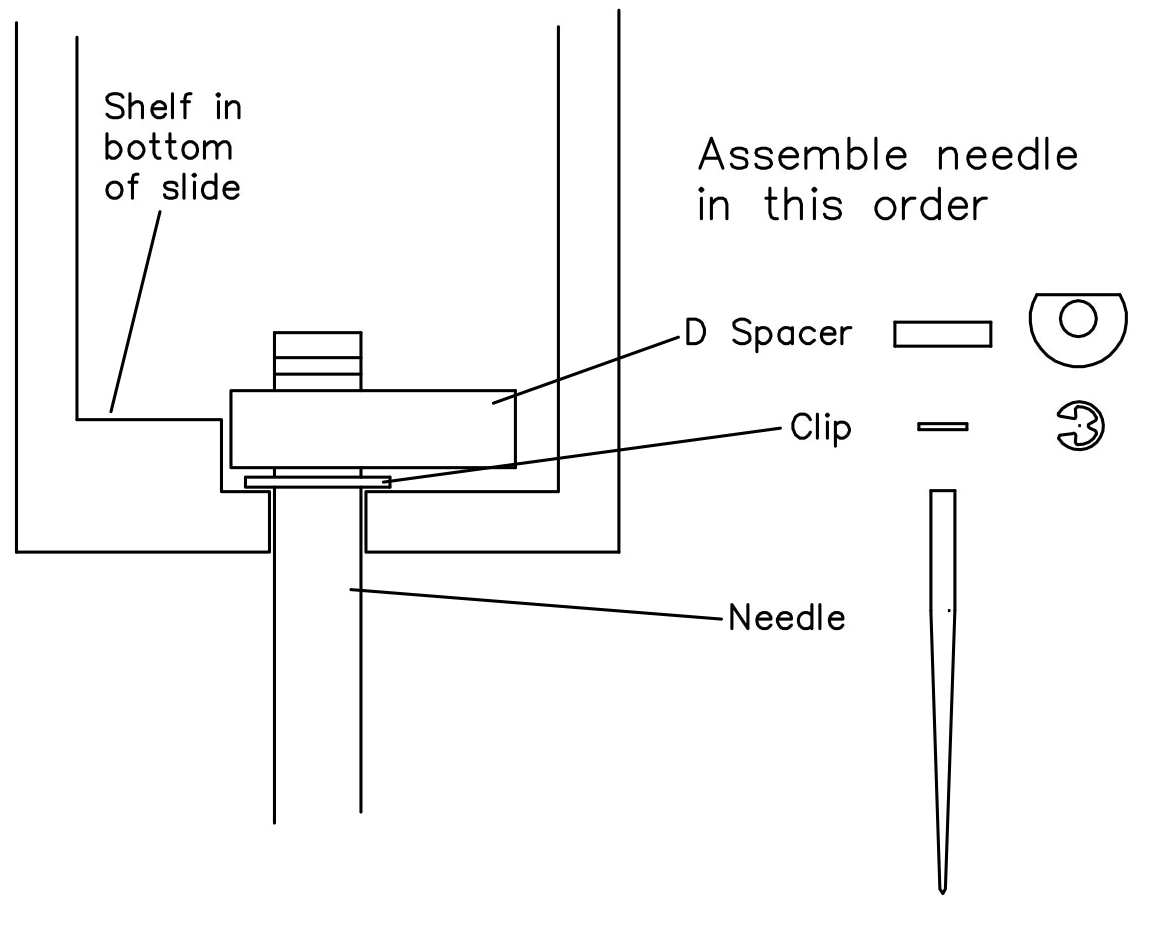
- Install D-Spacer on top of the E-clip.
- Install the needle into the slide. Align the open side of the E-clip and the flat on D-Spacer with the shelf in the bottom of the slide. The needle should come straight out of the bottom of the slide – not at an angle.
- Install the spring (with its plastic collar) into the slide. Re-install the slide into the carburetor body. Make sure the O-ring is in place (Fig 1). Attach the cap using the stainless-steel socket head bolts.
- Find the idle fuel mixture screw location on the bottom of the carburetor. If there is a brass plug it must be removed. Using the included drill bit, carefully drill a hole in the middle of the plug. Screw the sheet metal screw into the hole and using pliers or vice grips pull the plug out of the carburetor body.
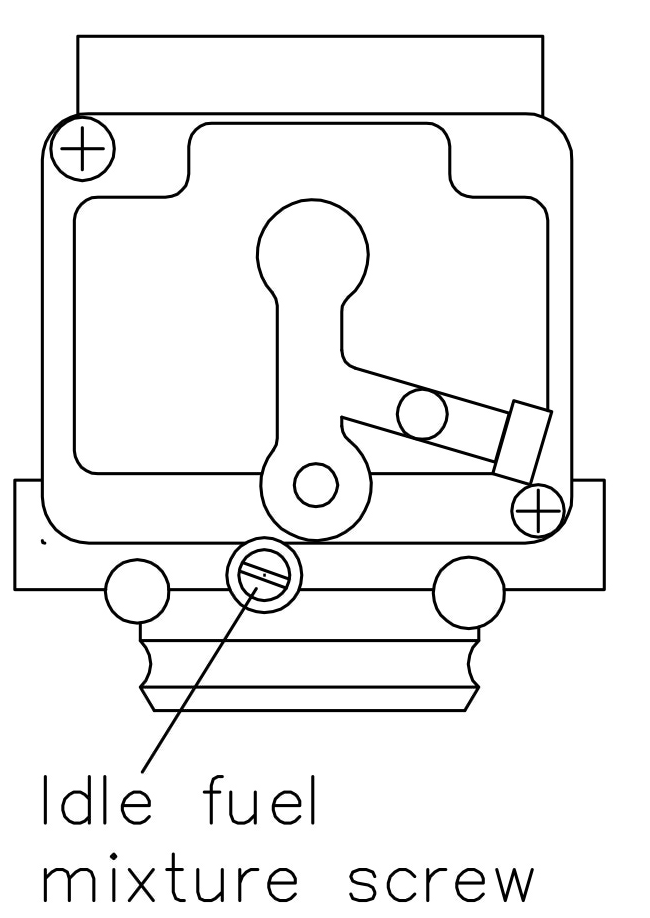
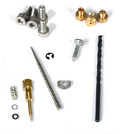
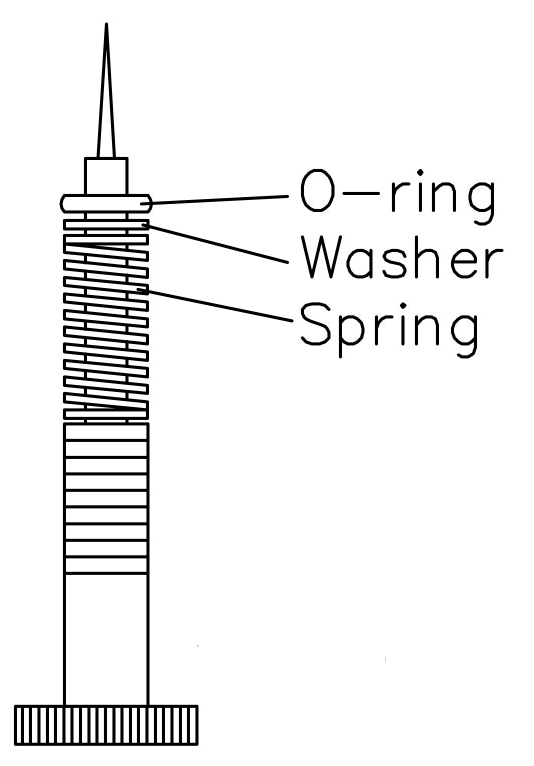
- Remove the idle fuel mixture screw along with the original spring, washer and O-ring. Put the new spring, washer and O-ring on the extended idle mixture screw included in the Jet Kit (Fig 5) and install it into the carburetor body. Screw it in (clockwise) until it gently bottoms out. Turn the screw out (counter-clockwise) two revolutions.
- Remove the float bowl. The two screws than hold the float bowl on may be installed extremely tight from the factory. Use a new, good quality screwdriver and lots of pressure to avoid stripping the screw heads.
Replace the main jet.
Suggested Jetting Exhaust type Main jet Wide open race exhaust #155 Free flowing exhaust #150 Stock exhaust #145 - Remove the float assembly and replace the two O-rings on that assembly with the 2 new O-rings included with the Jet Kit, then re-install the float assembly into the carburetor.
- Check the float height. Correct float height is 14.7mm. Float height adjustment is covered in the fuel section of the service manual.
- Re-install the float bowl using the new stainless-steel socket head bolts.
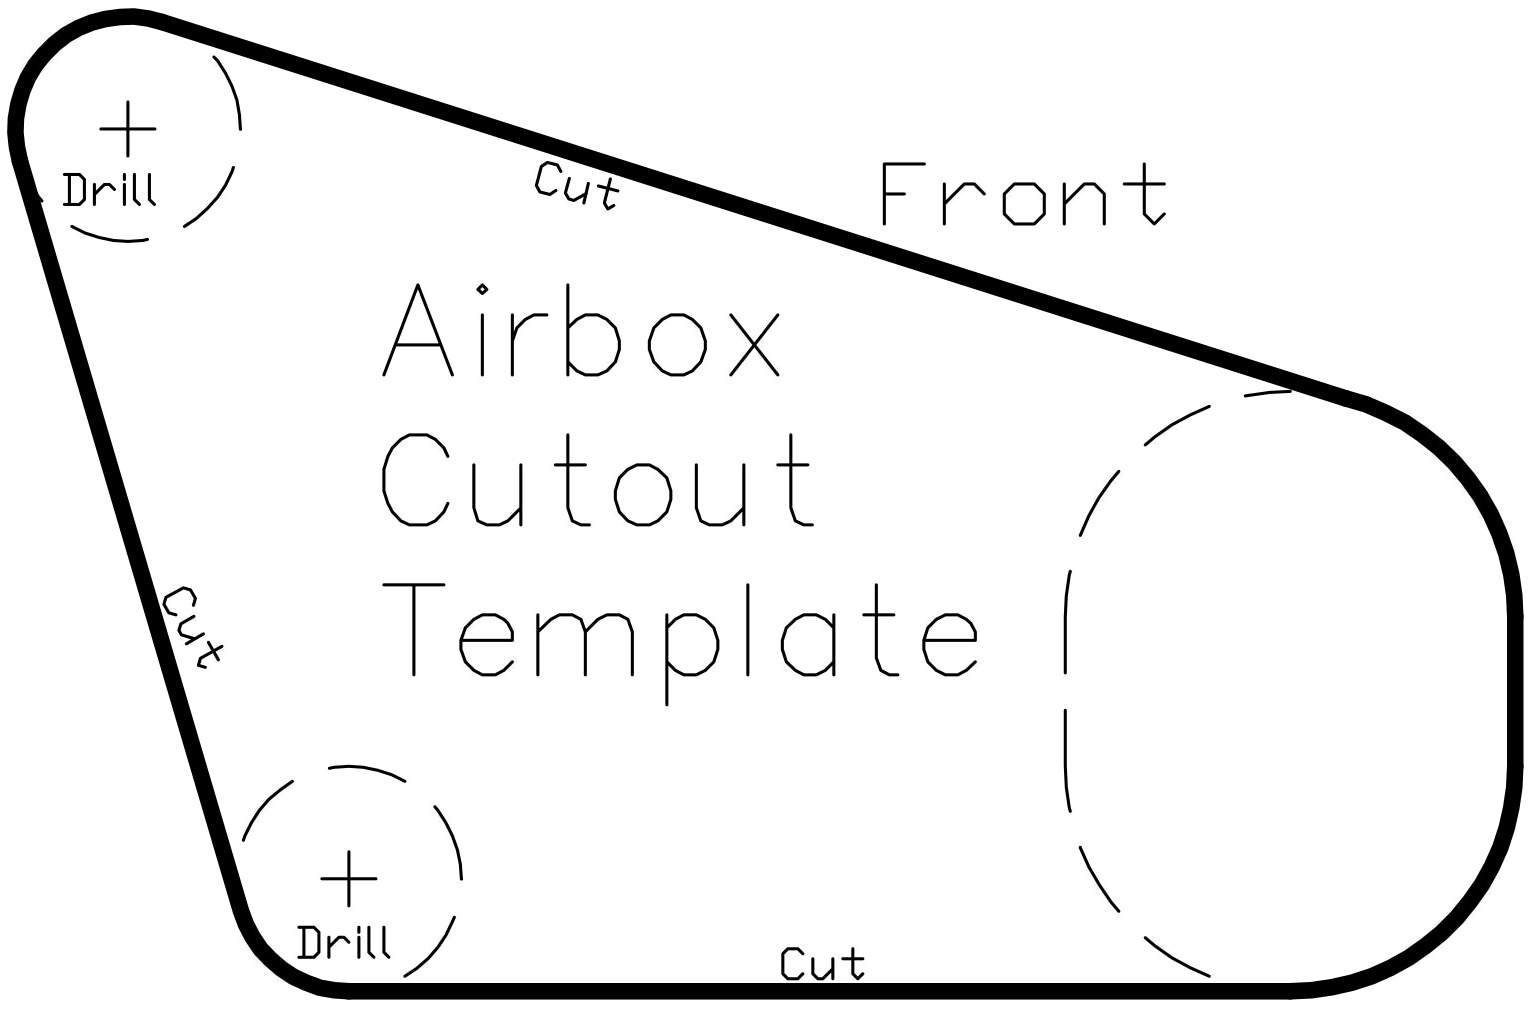
- Modify the airbox.
- Remove the rubber snorkel from the top of the air filter box.
- Remove the air filter.
- Use the template provided to cut out the top of the airbox. If you don’t want to cut your airbox you can remove the side cover from the box. You must do one or the other.
- Reinstall the air filter.
- Re-install the carburetor.
Tuning
Evaluate all adjustments only with the motor fully warmed up (after at least 5-10 miles of spirited riding).
Idle fuel mixture:
Turn the idle mixture screw inwards (clockwise) until the idle speed starts to drop or become slightly rough. Screw the mixture screw out (counter-clockwise) until the idle just smooths out.
Main jet:
To test the main jet selections run the bike at wide open throttle in 4th gear on a level road. When the bike is pulling cleanly at a good high RPM & wide-open throttle slowly back off on the throttle to about 7/8 throttle. If the bike picks up speed or power as you slightly back off the throttle then you are running too lean on the main jet. If the bike only slows down slightly then your main jet selection is close. If it is too rich the exhaust note may sound flat as the motor revs out. If it is significantly too rich it may misfire as the revs climb.
Needle:
The 4th groove is a good starting point and will work well for most bikes. To go one step richer at midrange throttle, move the clip down to the 5th groove. Conversely to set it one step leaner move the clip up to the 3rd groove. Always count grooves from the top down.
The needle clip should be set on the highest groove (leanest setting) that still provides smooth steady speed engine operation and good throttle response.