Important: All appropriate safety equipment and gear must be used during the installation of this or any other ProCycle product including any time you work on a vehicle. ProCycle accepts no responsibility for injuries or damage incurred during the installation of any products.
Parts Supplied
| Quantity | Description |
| 1 | 6mm x 20mm Bolt |
| 1 | 8mm x 16mm Bolt |
| 1 | 6mm Nylock Nut |
| 1 | 6mm x 12mm Washer |
| 1 | Spacer |
| 1 | Tool Tube Clamp |
| 1 | Tool Tube Mounting Bracket |
| 1 | 3” x 13.25” Black ABS Pipe |
| 2 | Tube Plug |
| 1 | Installation Instructions |
Installation
We highly recommend that you thread lock all bolts prior to installation. Periodically re-check all nuts and bolts to maintain rigidity and structural integrity.
- Remove the stock tool holder on the left side of the motorcycle.
- Remove the Helmet Lock.
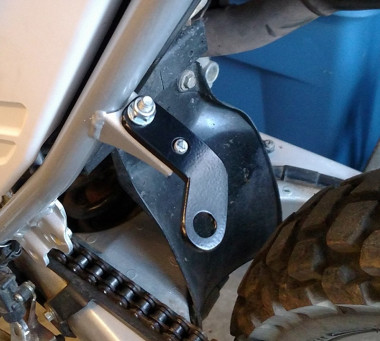
- Mount the Tool Tube Mounting Bracket to the lower mount used for the stock tool tube as shown below. Use the 6x20mm bolt, 6x12mm washer and 6mm nylock nut provided in the kit.
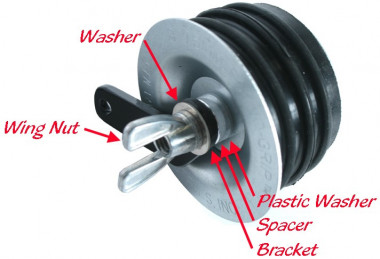
- Remove the wing nut and the metal washer from the lower cap bolt and then place the spacer on the bolt (be sure the plastic washer is between the cap and spacer). Place the bolt through the bracket, place the metal washer and wing nut on the bolt. Just start the wing nut with a few turns, do not tighten yet. See image below for exact order of hardware. Sometimes the Plug manufacturer does not include the Plastic Washer, it is not necessary.
- Place the PVC tube over the lower cap and tighten the wing nut.
- Slide the supplied clamp over the PVC tube and place the 8x16mm bolt through the bracket and into the threaded bracket on the frame that held the helmet lock and tighten.
- Place your tools in your new tube and insert end cap.
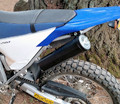
- Congratulations! You now have the biggest Tool Tube available for your WR.
WR250RX Tool Tube Installation Instructions

