Important: All appropriate safety equipment and gear must be used during the installation of this or any other ProCycle product including any time you work on a vehicle. ProCycle accepts no responsibility for injuries or damage incurred during the installation of any products.
Parts Supplied
- Taillight / License plate bracket
- 1 LED taillight
- 3 male bullet connectors
Tools Required
- 6mm wrench
- 10mm socket
- 17mm wrench
- Removable thread locking compound
- Wire cutters
- Crimping tool
Installation
TW200 Headlight & Tail Tidy Install
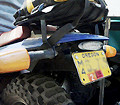
- Remove your license plate from the stock taillight assembly. Keep track of the hardware.
- Unplug the bullet style connectors on your rear turn signals. Make a note which wires plug in where.
- Slide the rubber covers off of the base of the turn signals and remove the nuts holding them in place with a 17mm wrench. Pull each turn signal off and set them aside for now.
- On the underside of the rear fender you will find two bolts holding the stock taillight assembly to the sub-frame of the TW200. Remove these two bolts with a 10mm socket. Be careful taking out the last bolt as there are still three wires connecting the taillight to the motorcycle. You don’t want the weight of the taillight assembly jerking on those wires. Support the assembly as you remove the last bolt.
- Unplug the three bullet connectors connected to the taillight and set the stock assembly aside.
- On the underside of the rear fender you’ll find two more bolts (approx. 2 inches further forward) like the ones you removed previously. Remove these two bolts with the 10mm socket. Note that these are slightly longer than the previous ones so keep track of which bolts go where on reassembly.
- Re-install your turn signals and plug them back into their connectors.
- Hold the new taillight bracket into position under the rear fender and thread all four bolts into place finger tight. Step back and make sure the bracket looks straight. When you like its position tighten all four bolts with the 10mm socket.
- Remove the two small nuts and washers from the back of the new LED taillight. Keep track of this tiny hardware as they are easy to lose.
- Hold the new taillight in position. The large hole in the center is for the wires to pass through. Take note of how much length you should trim from the wires on the back of the taillight. Leave yourself some slack to ensure the connections are easy to make.
- Pull the new taillight back off and trim the wires to the length you measured. Strip the wires and crimp the male bullet connectors onto all three wires.
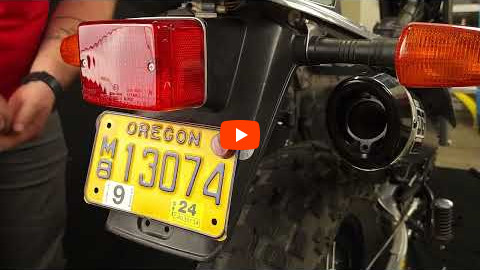
- Install the LED taillight. Please note, there are 3 or 4 LED bulbs that point down on the underside of the taillight, these are for lighting up your license plate. Make sure they are pointed down when you install the taillight. Put a drop of thread locking compound on each stud of the taillight and tighten the nuts with a 6mm wrench. Do not over tighten or you can crack the taillight.
- Connect the bullet connectors for the taillight. This may may take a little trial and error to get them hooked up correctly. You won’t hurt the LED light by hooking it up wrong, it just won’t work until you get each wire hooked up correctly.
On most of the LED taillights we supply the yellow wire is for ground, the black is for the taillight, and the red wire is for the brake light. However, this can vary! On some models of the TW200 the black wire is for ground, the blue wire is for the brake light, and the red wire is for the taillight. This may not be the same on all LED lights and all TW200’s. You can use a test light to verify the wires on your TW200 to make sure. - Install your license plate onto the new plate bracket.
- Reinstall your turn signals onto the frame where they were previously installed before removing the fender.
Test all your lights, then go for a ride!
TW200 Taillight Installation Instructions