To give you an idea of how your wheels are built and whether or not you want to tackle it, we have assembled a short pictorial for you. This is not intended to be an instructional document showing you exactly how to build your own wheels step by step, but more of informational page giving you an idea of what it takes to build a set of wheels from start to finish.
The first thing we do is organize and layout the parts in a clean work space. Be aware that in many spoke sets the right and left hand set of spokes will be different. One side may be longer and have a different bend. Occasionally the spokes will be the same length, but they will be a different bend and will go to specific sides of the wheel due to the angle that the holes are drilled in the rim. All of this is due to the shape of the hub. In the image below is a DR650 hub with one side of the spokes placed in the hub and we are just starting to install the second side.
Image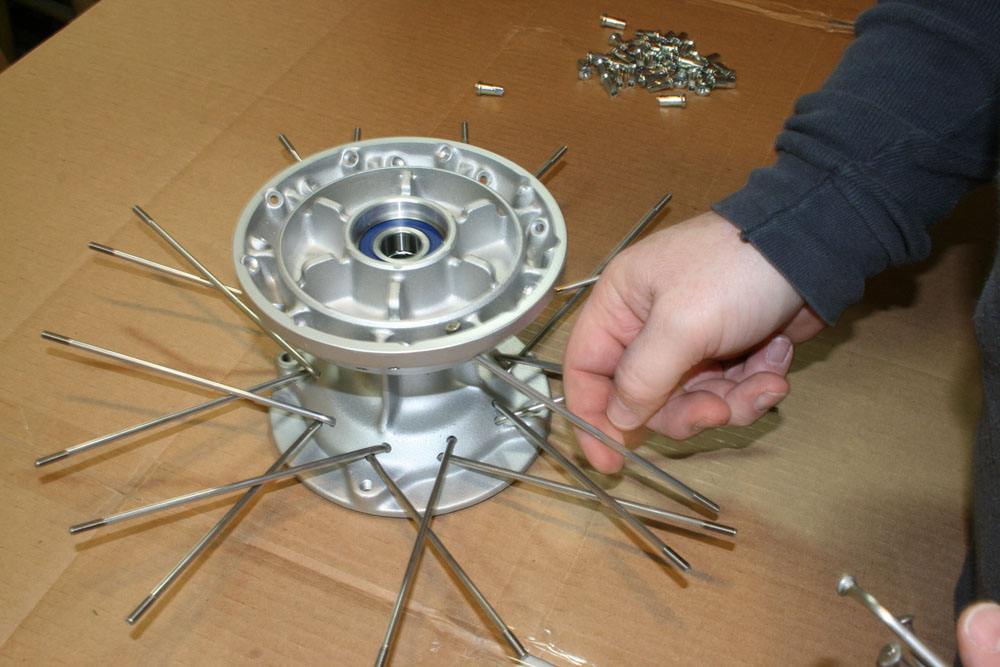
- Just before we put the spokes into the rim, we apply a thread compound to the threaded end of each spoke. This not only helps lubricate the nipples as they get tightened later on, but it also prevents them from corroding and binding up in the future. This means that when you go to tighten up your spokes someday, you will actually be able to turn the spokes easily and not worry about breaking them.
Then we lay the rim out and make sure that we have it oriented correctly, being sure that the spokes line up correctly with the drilled holes. This is what we have just done in the image below.
Image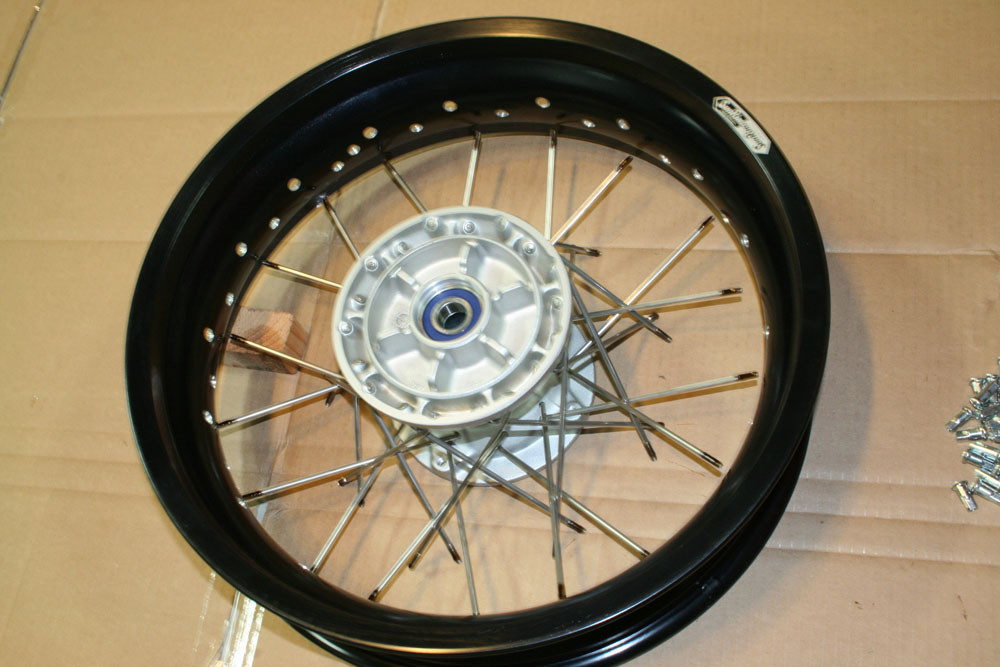
- After getting all the spokes into the rim and the nipples loosely attached, we tighten the nipples down enough to remove the majority of slack. With most of the slack removed, we then consult our wheel bible for the correct offset numbers and eyeball the rim to that spacing.
Now the entire wheel assembly gets put in the truing stand where it undergoes a rough side to side truing using a dial indicator. Then we check the offset again and tighten all the spokes around the wheel while checking the in and out accuracy. Remember that a wheel has to be not only in true from side to side, but it is also in the round. You don’t want to be bouncing down the road with an out of round wheel! In the image below you can see a wheel being trued with a dial indicator.
Image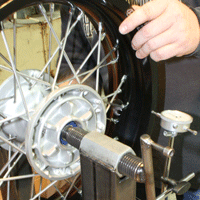
Basically this process continues, checking the side to side run-out and the in and out run-out. Then back to check the side to side and so on until the rim meets our very strict standards. Once the wheel is trued and the spokes checked and given a final snug down, then it is over to the grinding station where any spokes that have protruded through the back of the nipples are ground down.
Image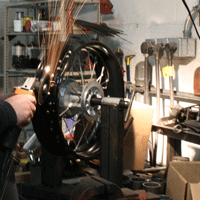
- Rim has been aligned, checked and double checked and excess spoke length removed. If new tires were a part of your order, we install the rim strips, tubes and tires at this time. Then it gets tossed up on the balancing stand and we add some lead to the appropriate spot to be sure that your new wheels are accurately balanced and ready to hit the pavement.